Containerized the Apple Silicon
Buying a new generation Apple computer is an adventure. It needs preparation, knowledge and a lot of motivation. Most of the time it was a journey that enjoy your live deeply or be frustrated. As I buy my Apple II it was amazing, but I learned very quickly how to add a Z80 and 68000 co processor board. The first Mac usage was awesome. A machine that create a lot of value. My NextStation pushed me in a complete new direction. I learned how to contribute software and how valuable it is to be connect with open source communities. It was an amazing moment in my life getting the first HTTP server up and running with a browser in 1990. The first power pc and later the Intel based MacOS X developer machine made it possible for me to train people so much easier and faster. In 2014 my mission begins to containerize everything with my tiny MacBook Air. I’ve hacked container a lot with this machine. In December 2014 I started containerizing my ARM based Raspberry PI II. What a hell…
Now 2020 a new generation of Apple M1 Silicon is available. Good news, congratulation to all of the wonderful people at Apple, who made this dream machine possible. I am sure that this machine will transport me to a new universe. Whhoo.
A new containerizing ARM journey begins now. You are warned to read this, it’s funny but check your timeline and skills before reading more. If you want to follow the trail, I hope that you are really well prepared for this mission.
Don’t go alone, stranger!
Why I need container runtime on my Apple Silicon?
Without container technology I can no longer develop or setup a system. I like experimenting with technology and combining the bricks together to create faster value. We standing on big shoulders, combining the right bricks together is the new business. I like building and using containers every day and orchestrating them with cloud native technologies.
But my friends in the cloud native community tell me that I have to wait a little bit to containerize the Silicon. No, this isn’t an option for me!
The Big Sur Virtualization Kit is an amazing abstraction to create VMs.
What is to do?
In theory, you need an ARM 64 ready Unix OS such as ubuntu, debian, fedora or suse. Create a linux virtual machine on top of Hyperkit. Start this VM, install docker, access it and have fun with available ARM based images.
Easy, isn’t it!

However, some new Big Sur features and the special Silicon System on Chip design made porting virtualization products more or less difficult. There are many new testing environments to be created and tons of new things to learn. We all hope the product teams get their job done in the next few months.
First: Not all programming languages, tools and apps are currently available. Apple engineers create the Rosetta 2 Intel CPU emulation that works so easily and fast that nothing stands in my way.
Without natively homebrew support, my developer life on a Mac isn’t possible. Without golang, java and container technology I can`t do my job..
Golang and Java are available.
- https://github.com/golang/go/issues/42684#issuecomment-731821237
- https://www.azul.com/downloads/zulu-community/?os=macos&architecture=arm-64-bit&package=jdk
- https://forums.macrumors.com/threads/python-java-development-on-apple-m1-macs.2269714/
- https://youtrack.jetbrains.com/issue/JBR-2526#focus=Comments-27-4527165.0-0
Check the rumor on twitter and a new container innovation can begin for you.
But…
The most software is available to containerize AArch64 linux images. Why can I use these ready to use native bricks today?
Boot your development with homebrew
After reading this article muliple brew installation by Sam Soffes regarding the Silicon, a new adventure begins.
First you need to install brew under Rosetta 2. This installation allows you to start developing and be part of the larger movement. Open a terminal and let the Intel brew install.
$ arch -x86_64 /bin/bash -c "$(curl -fsSL https://raw.githubusercontent.com/Homebrew/install/master/install.sh)"
After that, you can install the native Silicon brew from the homebrew master
$ sudo mkdir -p /opt/homebrew
$ sudo chown -R $(whoami):staff /opt/homebrew
$ cd /opt
$ curl -L https://github.com/Homebrew/brew/tarball/master | tar xz --strip 1 -C homebrew
Add both brews to your ~/.zshrc and make your Intel brew more accessible.
$ export PATH="/opt/homebrew/bin:/usr/local/bin:$PATH"
$ alias ibrew='arch -x86_64 /usr/local/bin/brew'
NOTE: Don’t forget source ~/.zshrc or start a new shell!
Install a Ubuntu Linux VM on the Apple Silicon
Ok, create a Linux VM yourself, that is a really tough job, isn’t it?
I follow @justincormack on twitter and found the vftool on 27.11.2020 from Matt Evans. Nice catch.
- Clone the repo from Matt.
- Sign In to the apple developer program with your Apple ID.
- Install Xcode 12.2 on your Silicon.
- Create a local Apple developer cert.
- Compile the project.
- Download the OS images.
- Use the vftool to create a VM.

After a few days I found the correct hint on how to download the correct Ubuntu image. Thanks to the people who discuss the vftool issue 2!
- kernel: https://cloud-images.ubuntu.com/releases/focal/release/unpacked/ubuntu-20.04-server-cloudimg-arm64-vmlinuz-generic
- initrd: https://cloud-images.ubuntu.com/releases/focal/release/unpacked/ubuntu-20.04-server-cloudimg-arm64-initrd-generic
- disk image: https://cloud-images.ubuntu.com/releases/focal/release/ubuntu-20.04-server-cloudimg-arm64.tar.gz
Here the results of my journey and I hope you can follow the trail.
- Download and extract the Ubuntu 20.04 AArch64 OS image
$ mkdir -p ~/develop/ubuntu-20-4-1
$ cd ~/develop/ubuntu-20-4-1
$ wget https://cloud-images.ubuntu.com/releases/focal/release/unpacked/ubuntu-20.04-server-cloudimg-arm64-vmlinuz-generic
$ wget https://cloud-images.ubuntu.com/releases/focal/release/unpacked/ubuntu-20.04-server-cloudimg-arm64-initrd-generic
$ wget https://cloud-images.ubuntu.com/releases/focal/release/ubuntu-20.04-server-cloudimg-arm64.tar.gz
$ mv ubuntu-20.04-server-cloudimg-arm64-vmlinuz-generic vmlinux.gz
$ gunzip vmlinux.gz
$ mv ubuntu-20.04-server-cloudimg-arm64-initrd-generic initrd
$ tar xvfz ubuntu-20.04-server-cloudimg-arm64.tar.gz
$ mv focal-server-cloudimg-arm64.img ubuntu-20.04-disk.img
- Prepare your disk image
In order to be able to store a lot of data to the VM, you need to expand the disk image. You can do that with qemu-img. After a failed attempt to install it nativly, I used the Intel installation and resize the disk to 50Gb.
$ ibrew -v install qemu
$ qemu-img resize ubuntu-20.04-disk.img +50G
WARNING: Image format was not specified for 'ubuntu-20.04-disk.img' and probing guessed raw.
         Automatically detecting the format is dangerous for raw images, write operations on block 0 will be restricted.
         Specify the 'raw' format explicitly to remove the restrictions.
Image resized.
- Start the Ubuntu VM to bootstrap the OS
$ export PATH=$HOME/Library/Developer/Xcode/DerivedData/vftool-gifyyerhcgkkioeipwnxidpgzatn/Build/Products/Debug:$PATH
$ vftool \
  -k vmlinux \
  -i initrd \
  -d ubuntu-20.04-disk.img \
  -m 2096 \
  -a "console=hvc0"
- Prepare the OS
Open a second terminal with screen:
- mount the disk
- disable cloud-init
- setup hostname and ssh host key
- attach to network bridge for the next boot
- resize the file system
$ screen /dev/ttys002
> mkdir /mnt
> mount /dev/vda /mnt
> chroot /mnt

> touch /etc/cloud/cloud-init.disabled

> echo 'root:BeeHive42#' | chpasswd

> echo "beesilicon" >/etc/hostname
> ssh-keygen -f /etc/ssh/ssh_host_rsa_key -N '' -t rsa
> ssh-keygen -f /etc/ssh/ssh_host_dsa_key -N '' -t dsa
> ssh-keygen -f /etc/ssh/ssh_host_ed25519_key -N '' -t ed25519

> cat <<EOF > /etc/netplan/01-dhcp.yaml
network:
    renderer: networkd
    ethernets:
        enp0s1:
            dhcp4: true
    version: 2
EOF

> exit
> umount /dev/vda
Stop the bootstrap VM on first terminal with CTRL-C.
- Boot the VM again and use it
Normal boot the VM with attach /dev/vda as root fs and at more mem and cpu power:)
$ vftool \
  -k vmlinux
  -i initrd \
  -d ubuntu-20.04-disk.img \
  -m 2048 \
  -p 2 \
  -a "console=hvc0 root=/dev/vda"
Open the tty on the second terminal, login as root and resize the fs:
$ screen /dev/ttys002
# login as root
> uname -a
Linux beesilicon 5.4.0-54-generic #60-Ubuntu SMP Fri Nov 6 10:42:16 UTC 2020 aarch64 aarch64 aarch64 GNU/Linux
> ip addr show | grep "inet 192"
    inet 192.168.64.3/24 brd 192.168.64.255 scope global dynamic enp0s1
> resize2fs /dev/vda
Now your are on the linux business at your Silicon!
Congratulations.
Containerize the new Ubuntu VM
Now you can install the software available for Ubuntu. You can install the Docker Engine and start containerizing the Silicon.
I found a nice post by Sven A. Schmidt with a concrete docker experiment.
- https://github.com/JacopoMangiavacchi/M1-Linux-SSH
- https://finestructure.co/blog/2020/11/27/running-docker-on-apple-silicon-m1-follow-up
- https://finestructure.co/blog/2020/11/27/running-docker-on-apple-silicon-m1
$ sudo apt-get update
$ sudo apt-get install \
    apt-transport-https \
    ca-certificates \
    curl \
    gnupg-agent \
    software-properties-common
$ curl -fsSL https://download.docker.com/linux/ubuntu/gpg | sudo apt-key add -
$ sudo add-apt-repository \
   "deb [arch=arm64] https://download.docker.com/linux/ubuntu \
   $(lsb_release -cs) \
   stable"
$ sudo apt-get update
$ sudo apt-get install docker-ce docker-ce-cli containerd.io
$ sudo sh -c "cat <<EOF > /etc/docker/daemon.json
{
    \"storage-driver\": \"overlay2\"
}
EOF"
$ sudo service docker restart
Add a normal linux user and run your first container.
$ sudo adduser peter
$ sudo usermod -aG sudo peter
$ sudo usermod -aG docker ${USER}
$ su - ${USER}
$ docker run hello-world
Works for me!
However, open a new terminal on your Silicon and add one more thing…
Create an ssh key and add the ssh login authorization to your VM.
$ ibrew install ssh-copy-id
$ ssh-keygen -o -a 100 -t ed25519 -f ~/.ssh/id_ed25519-peter -C "peter.rossbach@bee42.com"
$ ssh-copy-id -i .ssh/id_ed25519-peter.pub peter@192.168.64.3
$ ssh-add -k ~/.ssh/id_ed25519-peter
$ cat >>~/.ssh/config <<EOF
Host beesilicon
  HostName 198.168.64.3
  User peter
  IdentityFile ~/.ssh/id_ed25519-peter
  IdentitiesOnly yes
EOF
Install the Docker CLI with Intel brew. Create an ssh context to access the Docker engine directly on your Silicon.
$ ibrew install docker
$ docker context create beesilicon --docker "host=ssh://peter@192.168.64.3"
$ docker context use beesilicon
$ docker version
Client: Docker Engine - Community
 Version:           19.03.13
 API version:       1.40
 Go version:        go1.15.5
 Git commit:        4484c46
 Built:             Sat Nov 14 19:17:25 2020
 OS/Arch:           darwin/amd64
 Experimental:      false

Server: Docker Engine - Community
 Engine:
  Version:          19.03.13
  API version:      1.40 (minimum version 1.12)
  Go version:       go1.13.15
  Git commit:       4484c46
  Built:            Wed Sep 16 17:02:11 2020
  OS/Arch:          linux/arm64
  Experimental:     false
 containerd:
  Version:          1.3.9
  GitCommit:        ea765aba0d05254012b0b9e595e995c09186427f
 runc:
  Version:          1.0.0-rc10
  GitCommit:        dc9208a3303feef5b3839f4323d9beb36df0a9dd
 docker-init:
  Version:          0.18.0
  GitCommit:        fec3683
Install the latest ARM Visual Studio Code and add the docker extension to access the Docker engine directly from your IDE.
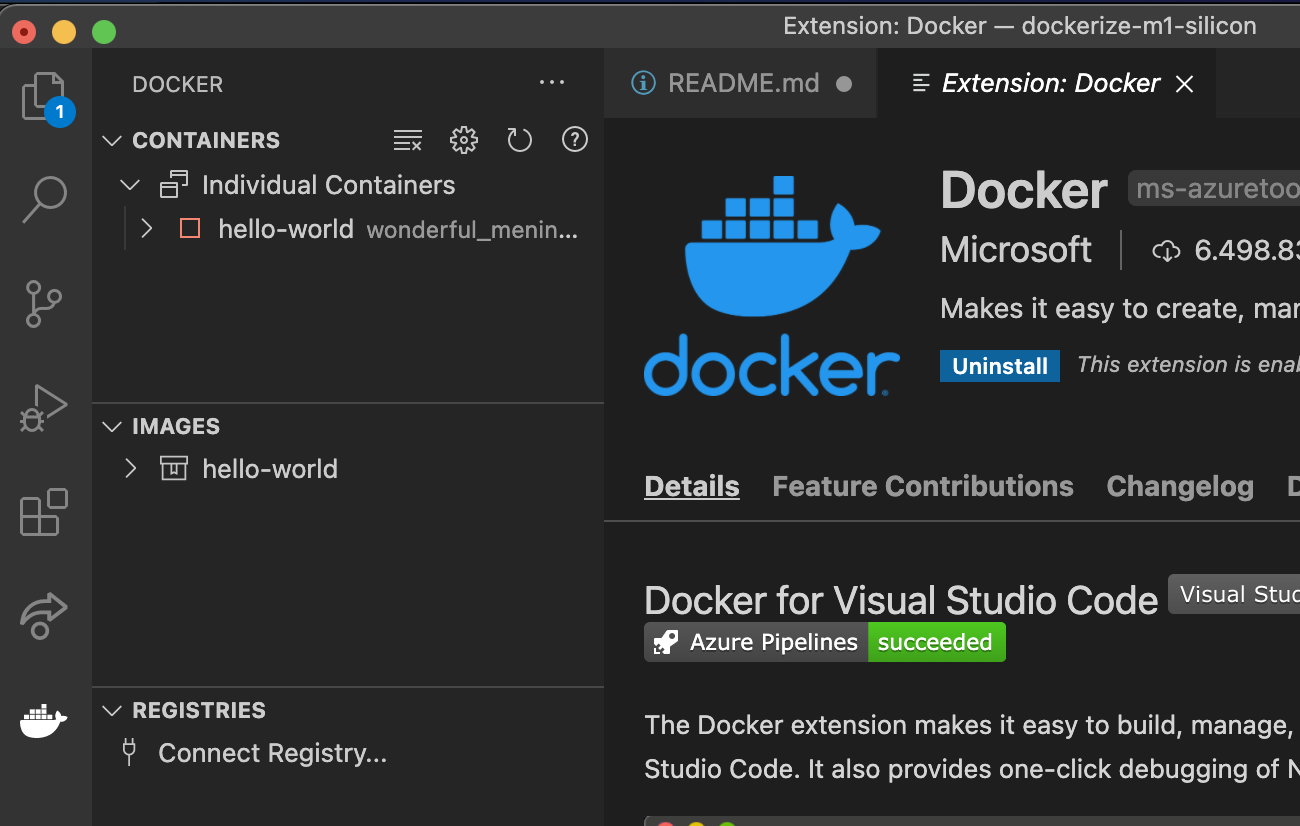
You are now on the happy path of becoming a container developer with your Silicon. Have fun containerizing the world.
This Containerized Silicon Mission has now been successfully completed. Please start following the trail and contribute the story of your adventure :)
My next mission is kubernetization on the Silicon.
Regards,
Peter (Pathfinder)
Update 2020-12-03
A few days ago mibosshard created a turn-key ready bundle containing SimpleVM and Ubuntu 20.10 . The image also works with vftool:
- https://github.com/mibosshard/SimpleVM/releases/download/20201128/SimpleVM_Ubuntu.zip
- https://github.com/mibosshard/SimpleVM/releases
Mibosshard also created a binary of vftool:
- https://github.com/mibosshard/vftool/releases/download/20201126/vftool.zip
- https://github.com/mibosshard/vftool/releases
The original project of this VM-Project is SimpleVM.
Here you can find a post on how to format disks
- Format disk space to your Silicon VM
- Create disk with dd :)
- Use another disk and format them
- Migrate docker folder and use overlay2
- Install docker-compose
Update 2020-12-04
Chris Torris Olsen wrote a blog post to create the vftool from scratch and create the first X86_64 container images with a Silicon linux vm.
- https://medium.com/@ctolsen/building-x86-64-docker-containers-on-apple-silicon-a6d868a18f37
- use docker buildx
- install qemu-system-x86
- Build X86_64 docker images at your Silicon ARM VM
- Compile vftool with cli
NOTE: I must install buildx on my Silicon manually!
$ mkdir -p ~/.docker/cli-plugins
$ curl -Ls \
  https://github.com/docker/buildx/releases/download/v0.4.2/buildx-v0.4.2.darwin-amd64 \
  -o ~/.docker/cli-plugins/docker-buildx
$ chmod a+x ~/.docker/cli-plugins/docker-buildx
# add experimental flag to ~/.docker/config.json
# "experimental" : "enabled"
$ docker buildx version
github.com/docker/buildx v0.4.2 fb7b670b764764dc4716df3eba07ffdae4cc47b2
Update 2020-12-10
Find this cool GUI Based VM Creator Project from PraneetNeuro
Works to create Linux VMs at Silicon and Intel based Big Sure Macs.
Create better disks to run Docker at the VM
Docker Desktop 3.0 Release
Docker publish Docker Desktop 3 with a lot of useful features. Register at the Developer Preview Program and give the Silicon release a chance.
- https://www.docker.com/blog/expanding-dockers-developer-preview-program/
- https://www.docker.com/community/get-involved/developer-preview
- https://www.docker.com/blog/introducing-docker-engine-20-10/