Getting Started with GitLab CI with Containers (Part 1)
We’re loving GitLab CI because it’s so easy to get your work done with perfectly configured CI and CD pipelines while staying focused on the software product development itself. For an efficient development and deployment workflow it is mandatory to have automated build and test pipelines in place which helps you to automate and secure all the boring stuff and this speeds up your dev and test cycles tremendously. This being said, in this post we’re going to describe a complete guide how to install and run a GitLab CI infrastructure the Docker way.
For this two part tutorial we’re going to install a complete GitLab CI server as a VM (virtual machine) using Oracle VirtualBox on macOS. Part 1 covers the basic installation of GitLab CI and part 2 will go deeper into the configuration and usage of GitLab.
Prerequisites for GitLab CI
These are the typical technical requirements we need to run a GitLab CI server on a Linux machine for a small workgroup. As you can see, you can even grow your team up to 100 users while still using the same system setup.
Linux host running the Docker Engine
Docker Machine tool
Docker Compose tool
Hardware specs (for the GitLab CI server)
- 2x vCPU’s (up to 500 users)
- 4x GByte memory (up to 100 users)
- Linux OS
- Ubuntu, Debian, CentOS, RHEL, SLES, Oracle Linux
- Software packages
- PostgreSQL, Redis, Sidekiq
Installation
Prerequisites on macOS
Install VirtualBox
Just grab the .dmg installer directly from https://www.virtualbox.org and follow the instructions to install VirtualBox v5.1.22 on your Mac.
🐳 vbox-img --version
5.1.22r115126
Install Docker Machine
You can follow the official instructions from Docker for installing Docker Machine from https://docs.docker.com/machine/install-machine/ or you can just use Homebrew to install and update it even easier on macOS.
🐳 brew install docker-machine
🐳 docker-machine --version
docker-machine version 0.11.0, build 5b27455
With the latest versions of VirtualBox and Docker Machine installed on your Mac you’re already prepared to go ahead and deploy a complete Docker host running in a local VM with a single command only.
Setting up the Docker Host
First, we’ll create a VirtualBox VM with the help of Docker Machine. Once the docker-machine tool is installed on your Mac, you can easily create a new VM with a running Docker Engine with a single command only.
Because docker-machine defaults to a machine driver for VirtualBox, we can omit the -d virtualbox or --driver virtualbox option. As we’d like to define 2x CPU’s and 4 GByte of memory for our VirtualBox VM, we have to use the appropriate options --virtualbox-cpu-count 2 and --virtualbox-memory 4096. With the last parameter we can define the name gitlab for our Docker Machine, so it’s easier for us to use it later on.
🐳 docker-machine create --virtualbox-cpu-count 2 --virtualbox-memory 4096 gitlab

Running pre-create checks...
(gitlab) No default Boot2Docker ISO found locally, downloading the latest release...
(gitlab) Latest release for github.com/boot2docker/boot2docker is v17.05.0-ce
(gitlab) Downloading /Users/dieter/.docker/machine/cache/boot2docker.iso from https://github.com/boot2docker/boot2docker/releases/download/v17.05.0-ce/boot2docker.iso...
(gitlab) 0%....10%....20%....30%....40%....50%....60%....70%....80%....90%....100%
Creating machine...
(gitlab) Copying /Users/dieter/.docker/machine/cache/boot2docker.iso to /Users/dieter/.docker/machine/machines/gitlab/boot2docker.iso...
(gitlab) Creating VirtualBox VM...
(gitlab) Creating SSH key...
(gitlab) Starting the VM...
(gitlab) Check network to re-create if needed...
(gitlab) Waiting for an IP...
Waiting for machine to be running, this may take a few minutes...
Detecting operating system of created instance...
Waiting for SSH to be available...
Detecting the provisioner...
Provisioning with boot2docker...
Copying certs to the local machine directory...
Copying certs to the remote machine...
Setting Docker configuration on the remote daemon...
Checking connection to Docker...
Docker is up and running!
To see how to connect your Docker Client to the Docker Engine running on this virtual machine, run: docker-machine env gitlab
Within only a few minutes, we should have a new Linux VM running, which is already equipped with the latest Docker Engine. So let’s check this out in more details.
🐳 docker-machine ls
NAME           ACTIVE   DRIVER         STATE     URL                         SWARM   DOCKER        ERRORS
gitlab         -        virtualbox     Running   tcp://192.168.99.100:2376           v17.05.0-ce
We can also login into this VM and check the Linux system locally if it fits our needs.
🐳 docker-machine ssh gitlab
                        ##         .
                  ## ## ##        ==
               ## ## ## ## ##    ===
           /"""""""""""""""""\___/ ===
      ~~~ {~~ ~~~~ ~~~ ~~~~ ~~~ ~ /  ===- ~~~
           \______ o           __/
             \    \         __/
              \____\_______/
 _                 _   ____     _            _
| |__   ___   ___ | |_|___ \ __| | ___   ___| | _____ _ __
| '_ \ / _ \ / _ \| __| __) / _` |/ _ \ / __| |/ / _ \ '__|
| |_) | (_) | (_) | |_ / __/ (_| | (_) | (__|   <  __/ |
|_.__/ \___/ \___/ \__|_____\__,_|\___/ \___|_|\_\___|_|
Boot2Docker version 17.05.0-ce, build HEAD : 5ed2840 - Fri May  5 21:04:09 UTC 2017
Docker version 17.05.0-ce, build 89658be
docker@gitlab:~$
The VM has about 4x GByte of memory…
docker@gitlab:~$ cat /proc/meminfo | head -1
MemTotal:        4045440 kB
…and 2x CPUs as we had requested.
docker@gitlab:~$ cat /proc/cpuinfo | grep processor
processor : 0
processor : 1
exit
Now, we’re able to use the Docker Engine directly from our Mac’s terminal app. With the command docker-machine env <machine-name> we’ll get all the necessary parameters to connect our Docker Client to the Docker Engine in the VM.
🐳 docker-machine env gitlab
export DOCKER_TLS_VERIFY="1"
export DOCKER_HOST="tcp://192.168.99.100:2376"
export DOCKER_CERT_PATH="/Users/dieter/.docker/machine/machines/gitlab"
export DOCKER_MACHINE_NAME="gitlab"
# Run this command to configure your shell:
# eval $(docker-machine env gitlab)
Connecting the Docker Client to our Docker host with the following command to set the environment variables. This points the Docker Client directly to our Docker Engine running in the VirtualBox VM. As you can see, it’s really easy to remote control a Docker Engine which is running in a VM or even in a cloud server far away from us.
🐳 eval $(docker-machine env gitlab)
Checking the version of the Docker Engine.
🐳 docker version
Client:
 Version:      17.05.0-ce
 API version:  1.29
 Go version:   go1.7.5
 Git commit:   89658be
 Built:        Thu May  4 21:43:09 2017
 OS/Arch:      darwin/amd64

Server:
 Version:      17.05.0-ce
 API version:  1.29 (minimum version 1.12)
 Go version:   go1.7.5
 Git commit:   89658be
 Built:        Thu May  4 21:43:09 2017
 OS/Arch:      linux/amd64
 Experimental: false
With this little preparation we do now have a complete Linux Docker host running within a VirtualBox VM on our Mac. The Docker host is based upon Boot2Docker 17.05.0-ce, with a recent LTS Linux kernel 4.4.66 and the very latest Docker Engine 17.05.0-ce. “ce” stands for “Cummunity Edition” which is the freely available Docker Engine.
If you may like, you could also use a Docker for Mac (D4M) installation on macOS, which is currently based upon Docker Engine 17.03.1-ce (stable channel) and 17.05.0-ce (edge channel) as of time of writing this article.
Create GitLab CI configuration
As we’re going to use Docker Compose to configure and deploy the GitLab CI server on our Docker host, we can describe the complete setup within a single configuration file in YAML format, the docker-compose.yml file.
File docker-compose.yml:
version: '2'

services:
  redis:
    restart: always
    image: sameersbn/redis:latest
    command:
    - --loglevel warning
    volumes:
    - redis-data:/var/lib/redis

  postgresql:
    restart: always
    image: sameersbn/postgresql:9.6-2
    volumes:
    - pg-data:/var/lib/postgresql
    environment:
    - DB_USER=gitlab
    - DB_PASS=password
    - DB_NAME=gitlabhq_production
    - DB_EXTENSION=pg_trgm

  gitlab:
    restart: always
    image: sameersbn/gitlab:9.1.2
    depends_on:
    - redis
    - postgresql
    ports:
    - "${GITLAB_HTTP_PORT}:80"
    - "${GITLAB_SSH_PORT}:22"
    volumes:
    - gitlab-data:/home/git/data
    environment:
    - DB_ADAPTER=postgresql
    - DB_HOST=postgresql
    - DB_PORT=5432
    - DB_USER=gitlab
    - DB_PASS=password
    - DB_NAME=gitlabhq_production

    - REDIS_HOST=redis
    - REDIS_PORT=6379

    - TZ=Europe/Berlin
    - GITLAB_TIMEZONE=Berlin

    - GITLAB_HTTPS=false
    - SSL_SELF_SIGNED=false

    - GITLAB_HOST=${GITLAB_IP_ADDRESS}
    - GITLAB_PORT=${GITLAB_HTTP_PORT}
    - GITLAB_SSH_PORT=${GITLAB_SSH_PORT}
    - GITLAB_SECRETS_DB_KEY_BASE=long-and-random-alphanumeric-string
    - GITLAB_SECRETS_SECRET_KEY_BASE=long-and-random-alphanumeric-string
    - GITLAB_SECRETS_OTP_KEY_BASE=long-and-random-alphanumeric-string

volumes:
  gitlab-data:
  redis-data:
  pg-data:
We’d like to have some of our local configuration options outside of the docker-compose.yml file and therefore creating a .env file with all the environment variables we need. Docker Compose reads the .env file automatically and uses the content to populate the variables in the docker-compose.yml file.
File .env:
GITLAB_HTTP_PORT=10080
GITLAB_SSH_PORT=10022
GITLAB_IP_ADDRESS=192.168.99.100
As you can see, we need to specify the correct IP address where we can connect to our Docker host. This IP address is easy to determine from Docker Machine with the following command:
🐳 docker-machine ip gitlab
192.168.99.100
Check GitLab CI configuration
Before we start the application stack, it’s always a good idea to check the Docker Compose configuration file first with the command docker-compose config. If everything wents fine and we don’t have any syntax errors in our YAML file, we’ll get a clean output without any errors. All variables should be replaced and we could easily check this visually.
🐳 docker-compose config
networks: {}
services:
  gitlab:
    depends_on:
    - postgresql
    - redis
    environment:
      DB_ADAPTER: postgresql
      DB_HOST: postgresql
      DB_NAME: gitlabhq_production
      DB_PASS: password
      DB_PORT: '5432'
      DB_USER: gitlab
      GITLAB_HOST: 192.168.99.100
      GITLAB_HTTPS: 'false'
      GITLAB_PORT: '10080'
      GITLAB_SECRETS_DB_KEY_BASE: long-and-random-alphanumeric-string
      GITLAB_SECRETS_OTP_KEY_BASE: long-and-random-alphanumeric-string
      GITLAB_SECRETS_SECRET_KEY_BASE: long-and-random-alphanumeric-string
      GITLAB_SSH_PORT: '10022'
      GITLAB_TIMEZONE: Berlin
      REDIS_HOST: redis
      REDIS_PORT: '6379'
      SSL_SELF_SIGNED: 'false'
      TZ: Europe/Berlin
    image: sameersbn/gitlab:9.1.2
    ports:
    - 10080:80/tcp
    - 10022:22/tcp
    restart: always
    volumes:
    - gitlab-data:/home/git/data:rw
  postgresql:
    environment:
      DB_EXTENSION: pg_trgm
      DB_NAME: gitlabhq_production
      DB_PASS: password
      DB_USER: gitlab
    image: sameersbn/postgresql:9.6-2
    restart: always
    volumes:
    - pg-data:/var/lib/postgresql:rw
  redis:
    command:
    - --loglevel warning
    image: sameersbn/redis:latest
    restart: always
    volumes:
    - redis-data:/var/lib/redis:rw
version: '2.0'
volumes:
  gitlab-data: {}
  pg-data: {}
  redis-data: {}
Start GitLab CI server
With all the checks passed successfully we can now start the complete GitLab CI application stack we’ve previously defined within the Docker Compose YAML file. And this can be done with a single easy command, too. BTW, that’s exactly the same with Docker Compose every time - no matter how simple or how complex your actual application stack looks like!
🐳 docker-compose up -d
After a few minutes all the referenced Docker images got pulled from the Docker Hub and all the services we’ve defined in the docker-compose.yml file should be started. At the end the complete GitLab CI server should be up and running.
But before we’re going to login into the GitLab CI web interface the very first time, we should check the application stack with some simple Docker Compose commands. With docker-compose ps we can list all the running services, checking their states and see what network ports they are exposing.
🐳 docker-compose ps
           Name                         Command               State                           Ports
---------------------------------------------------------------------------------------------------------------------------
gitlabexample_gitlab_1       /sbin/entrypoint.sh app:start    Up      0.0.0.0:10022->22/tcp, 443/tcp, 0.0.0.0:10080->80/tcp
gitlabexample_postgresql_1   /sbin/entrypoint.sh              Up      5432/tcp
gitlabexample_redis_1        /sbin/entrypoint.sh --logl ...   Up      6379/tcp
As you can clearly see from the above output, all the three services (gitlab, postgresql and redis) are up and running. We can also see, that the gitlab service exposes two public network ports - 10022/tcp for SSH access and 10080/tcp for the GitLab CI web interface.
In case of trouble we could also check the log files which can be easily accessed with the command docker-compose logs.
Now, we can open the web UI of the running GitLab CI server.
🐳 open http://192.168.99.100:10080
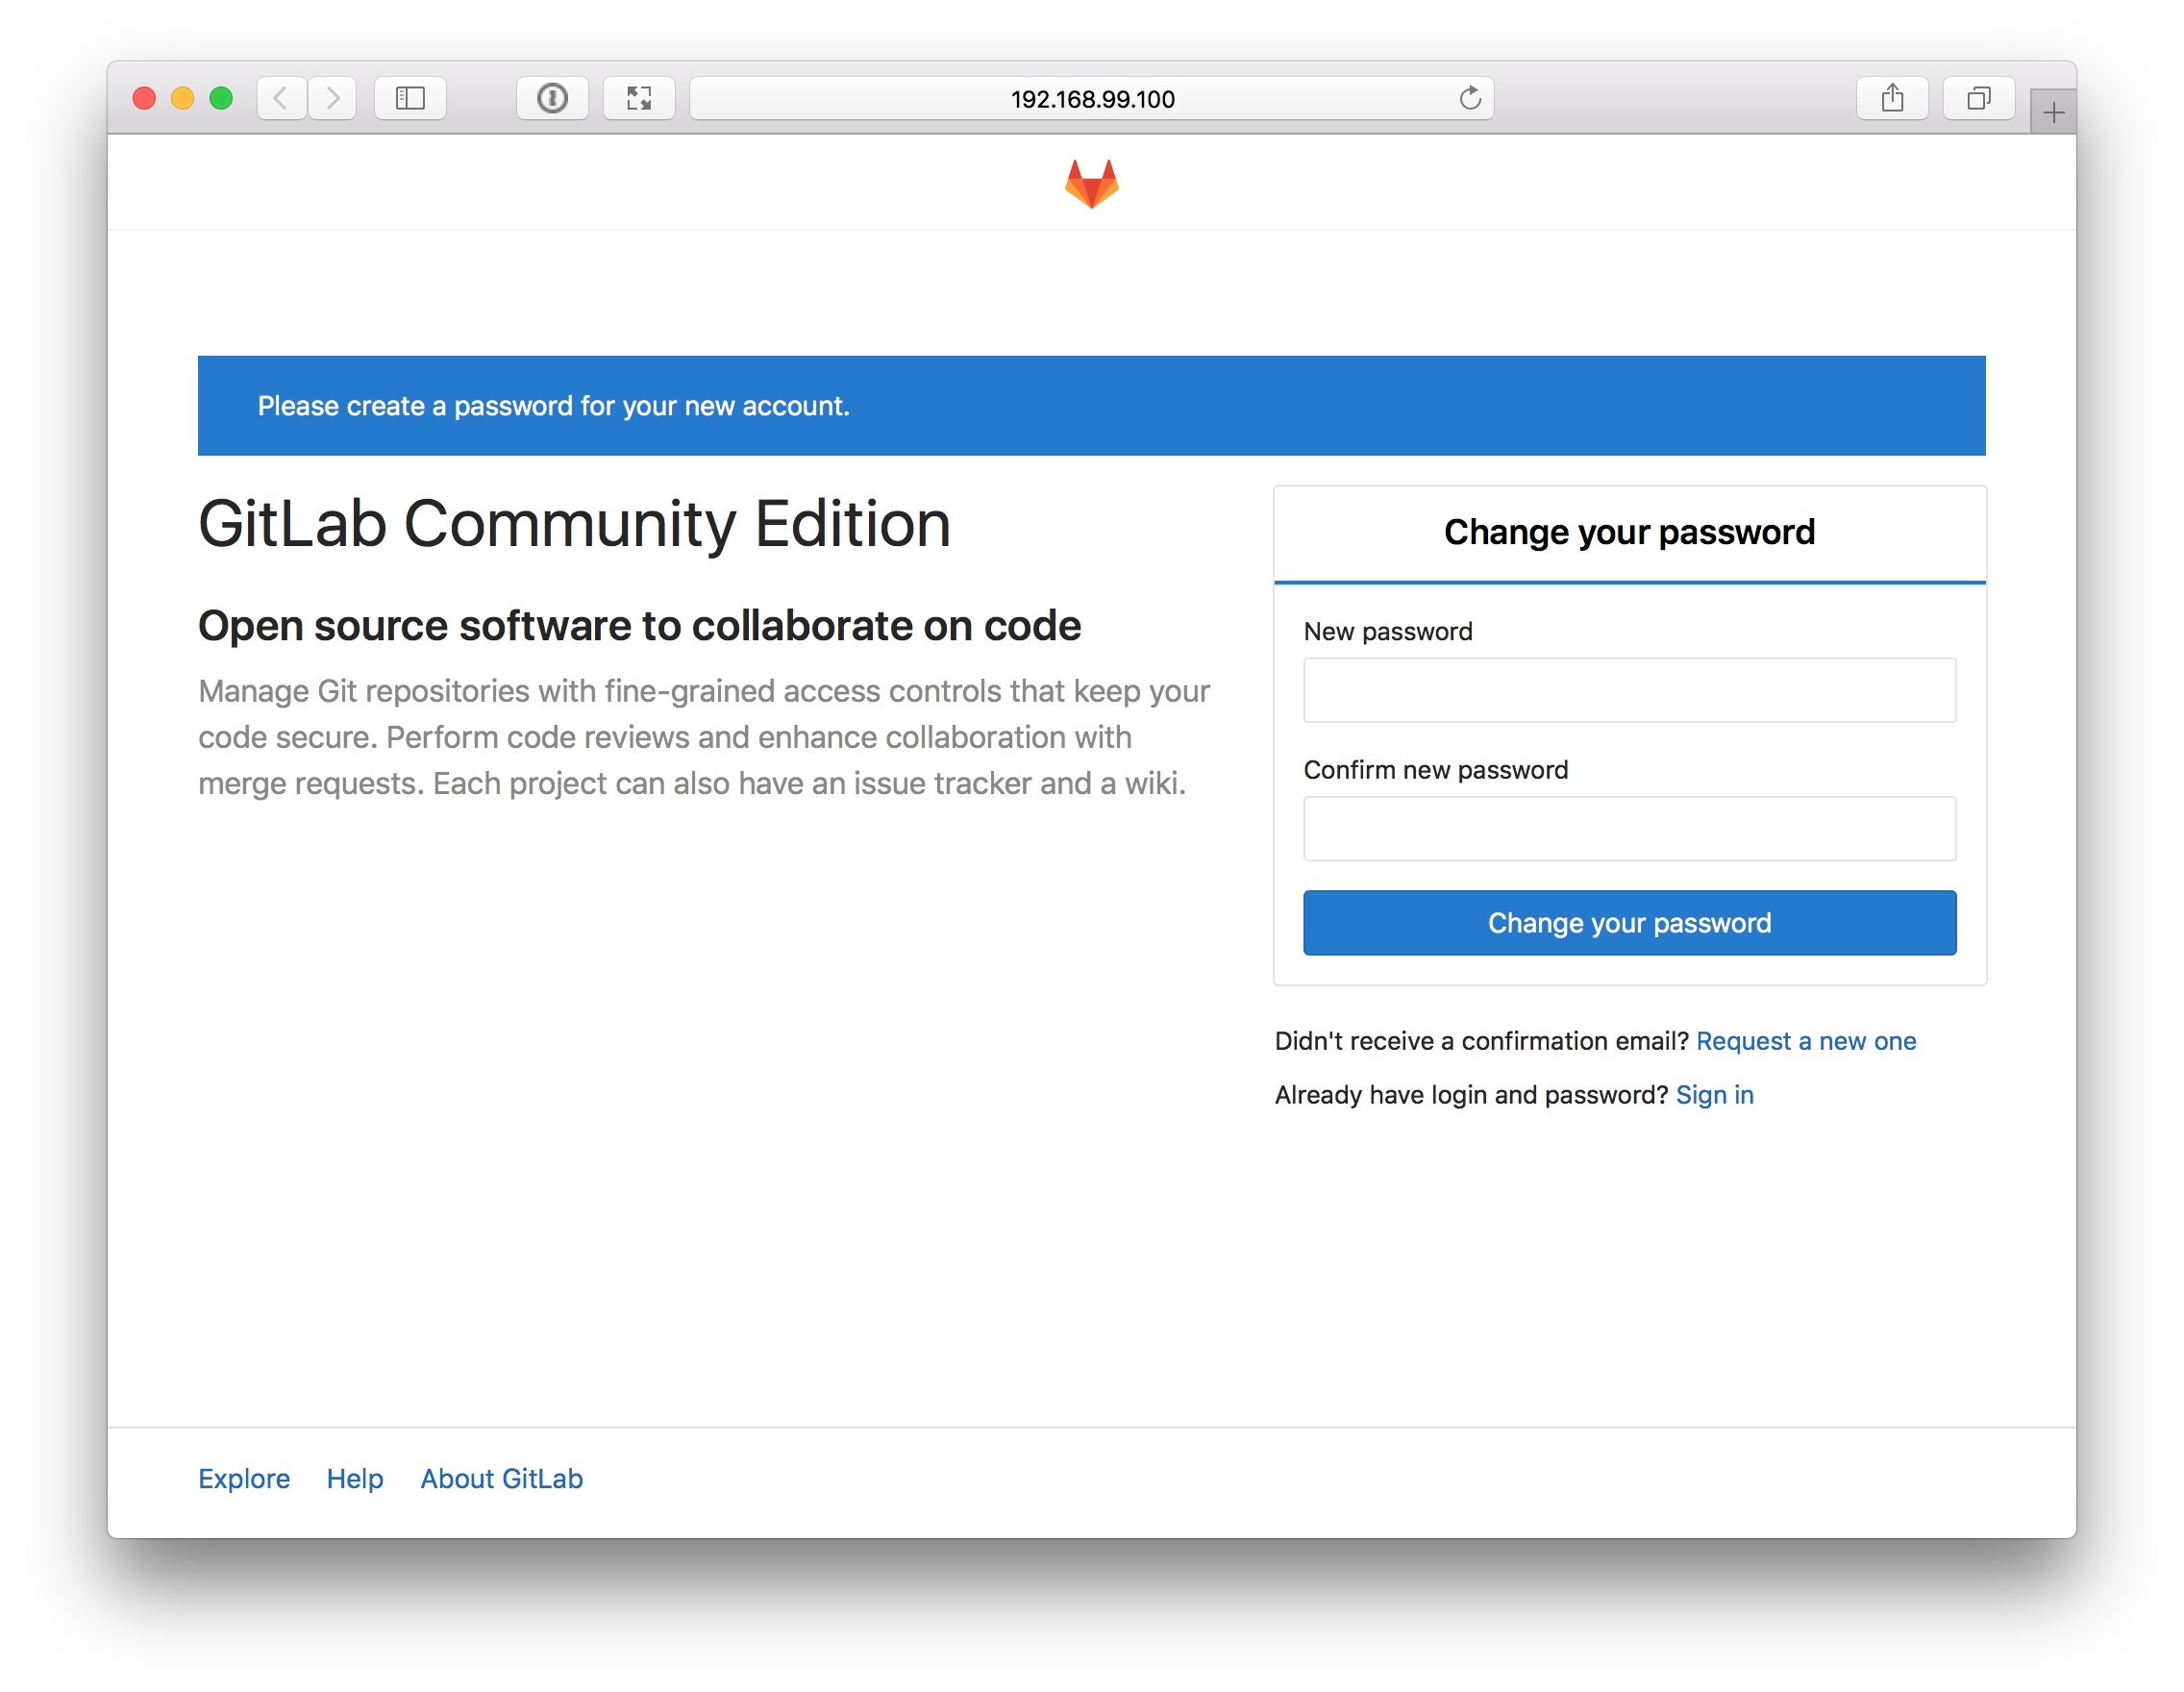
In this first login screen you have to set the root password of the GitLab CI server.
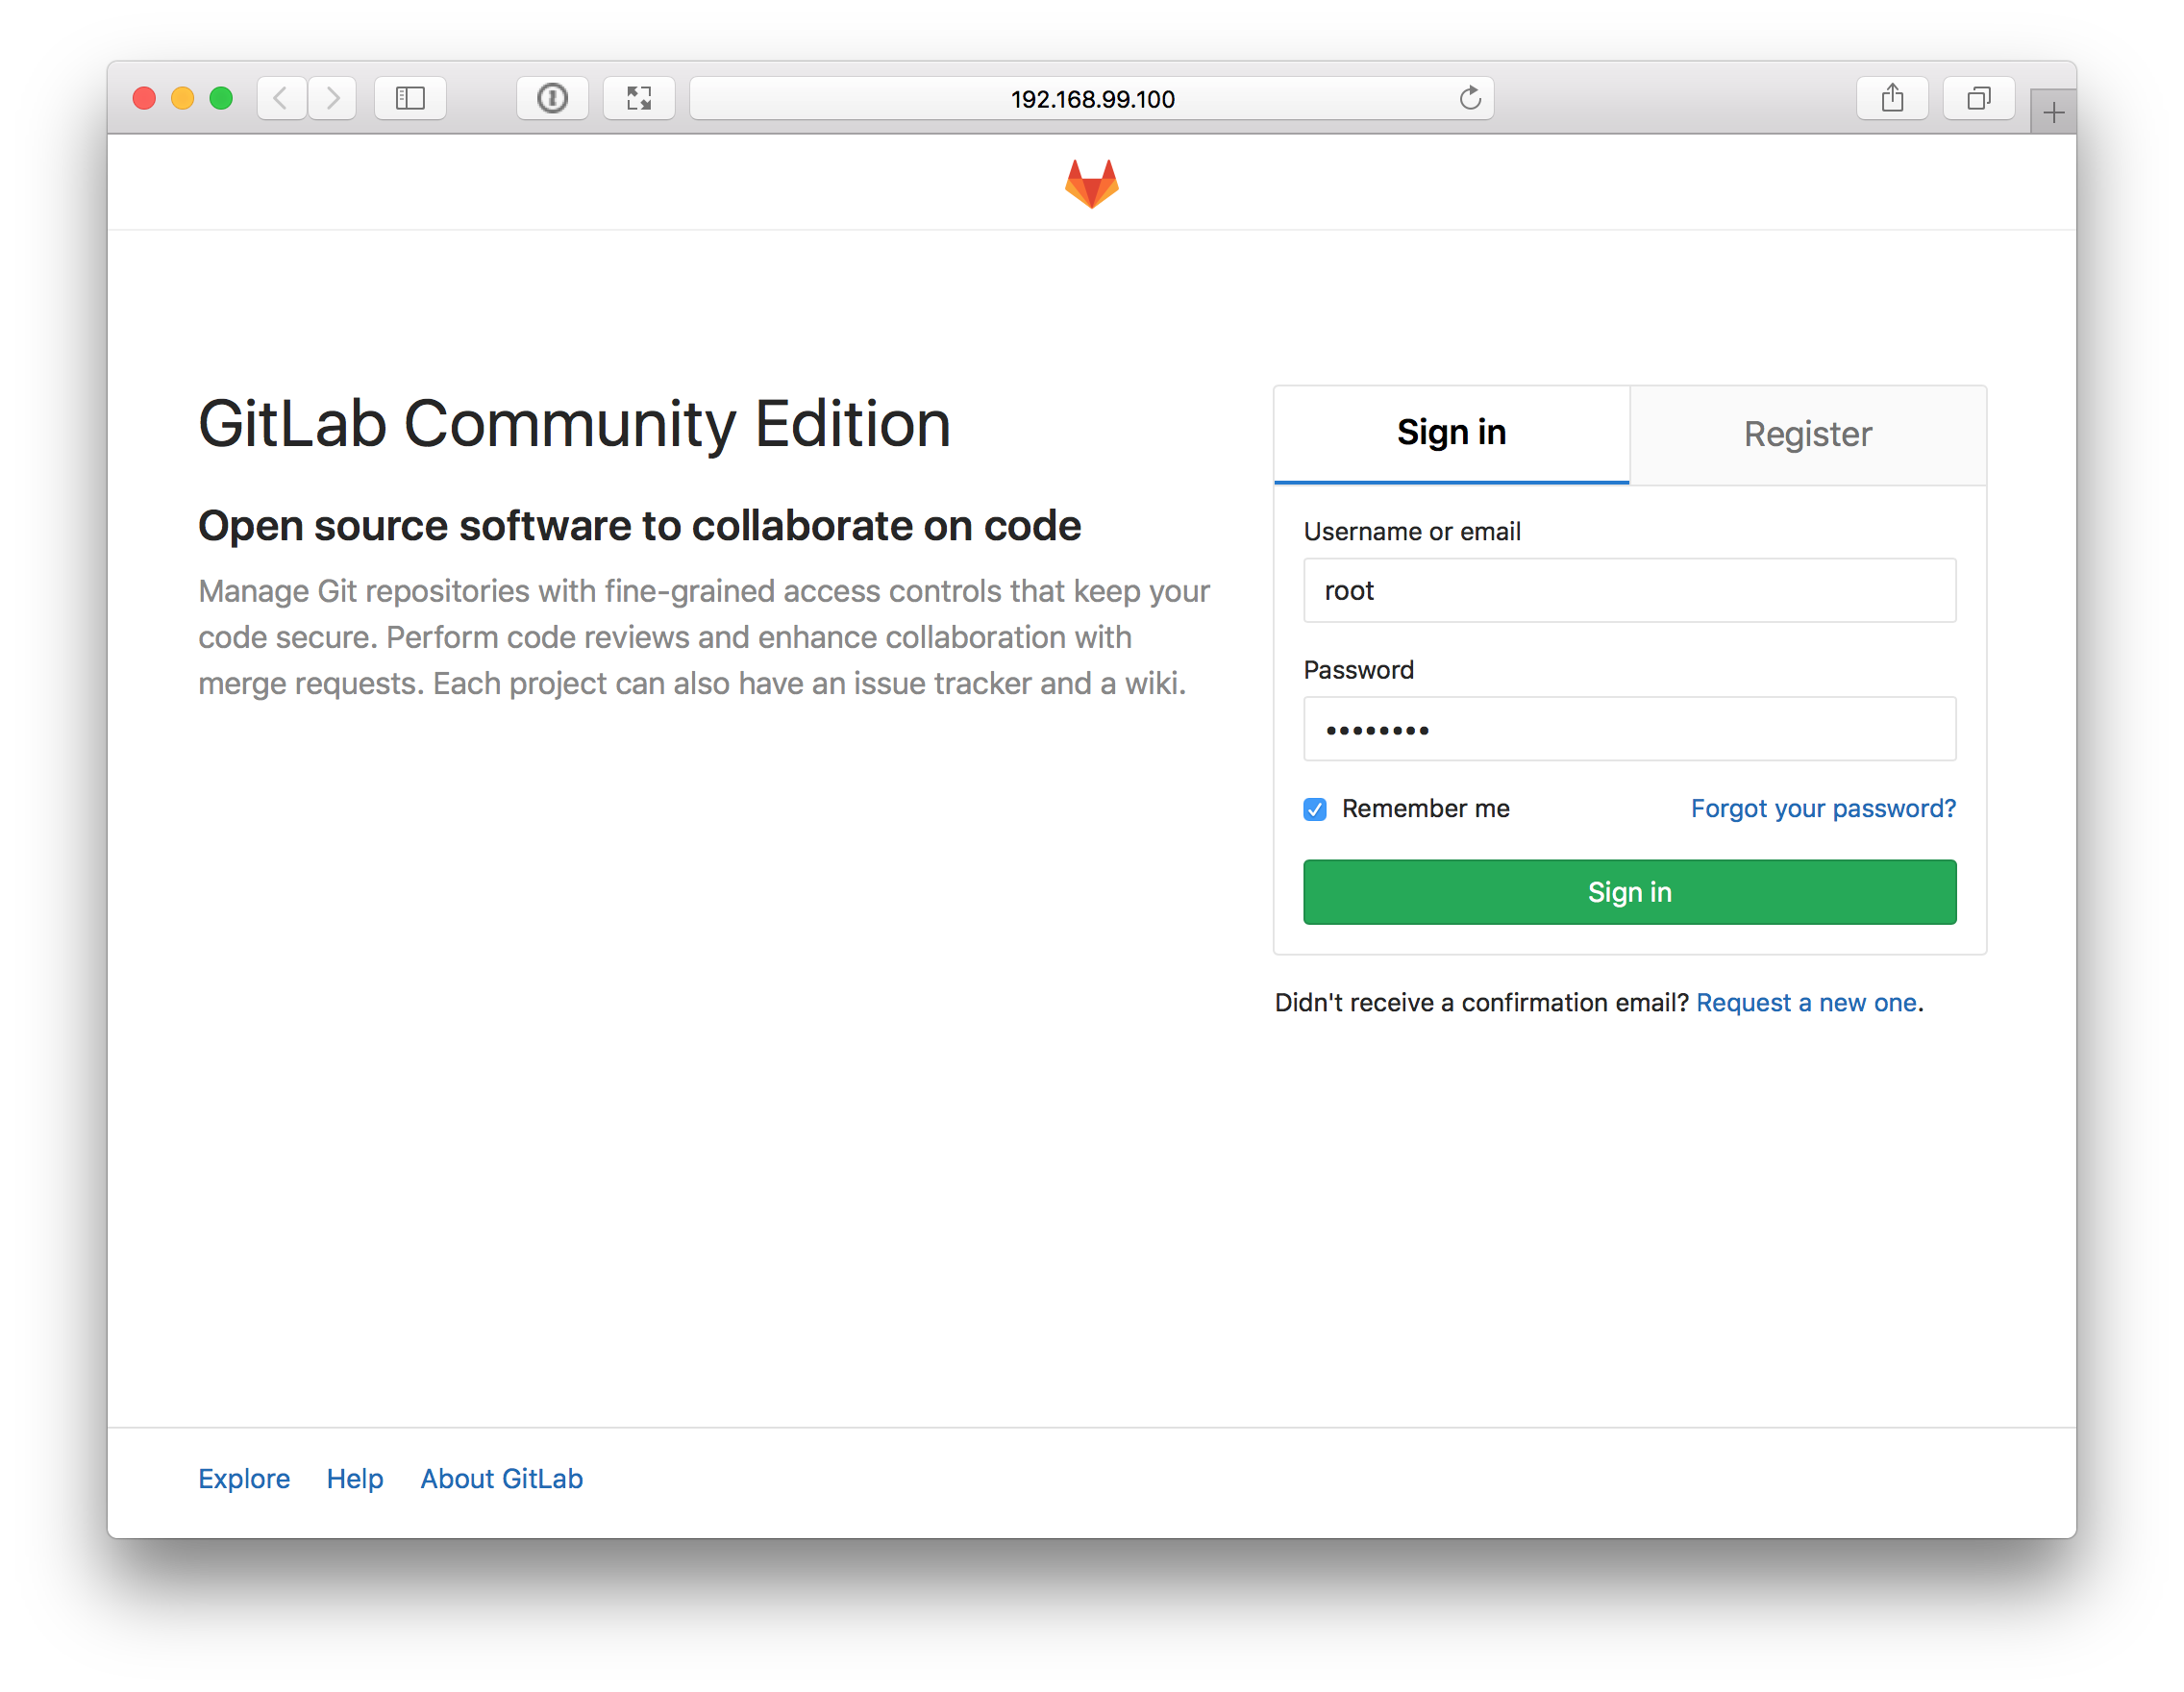
Now, you can login as user root with the correct password,
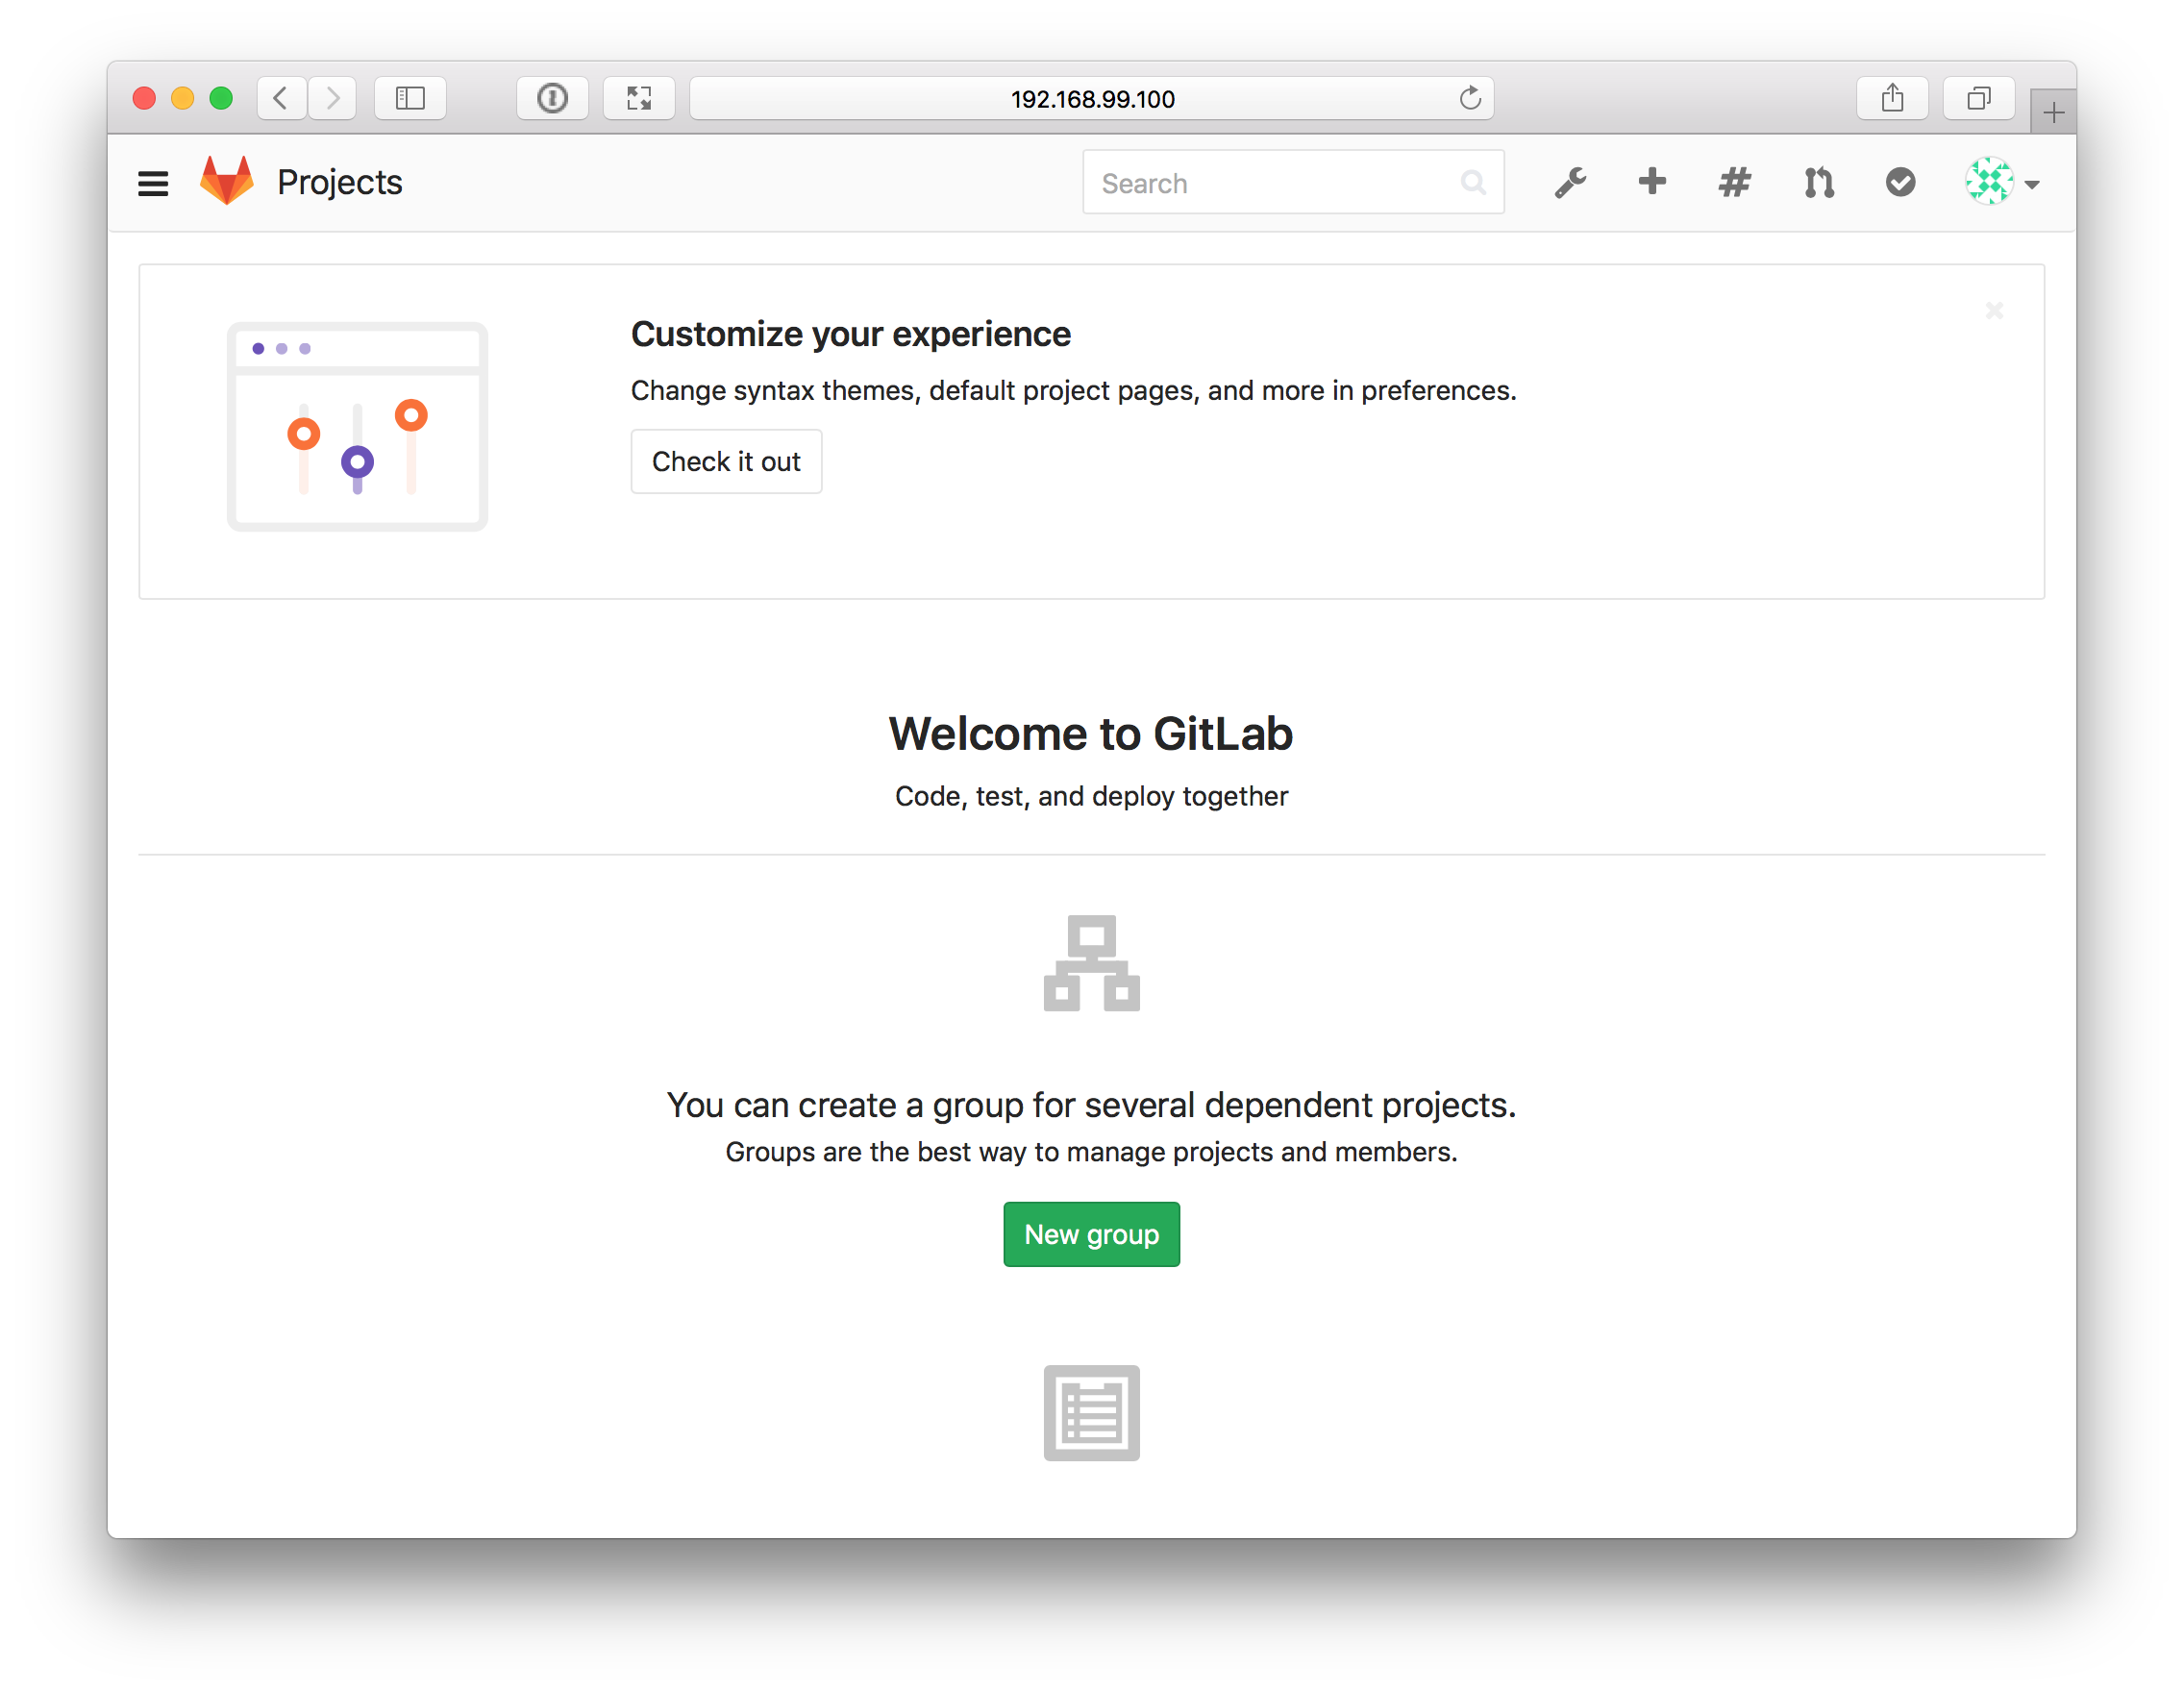
and get instant access to the GitLab CI server as a primary administrator.
Recap TL;DR
In order to start a complete GitLab CI server, we just need a running Docker host, a docker-compose.yml file which defines all needed services and an additional .env file containing some environment variables. That’s really basically all we need!
With a single command docker-compose up -d we can start the complete GitLab CI server.
Next Steps
With these first steps covered in part 1 of our GitLab CI tutorial, we do have now a fully working GitLab CI server up and running. The basic configuration and usage of GitLab CI we’re going to describe in more details in part 2, which will be released in a few days…