LinuxKit meets AWS, a technical POC
LinuxKit was introduced at last DockerCon 2017 in Austin,TX and it’s announced as “a toolkit for building custom minimal, immutable Linux distributions”.
This basically means you can package and run your application within a minimal Linux-based OS where you are able to use only the parts you really need for your application to work. You can select the Linux kernel of your choice, some required system services and your application code to bake them all together in an executable machine image. With LinuxKit you can easily create your custom images for bare metal, different hypervisors or cloud providers.
Through the help of Docker container technology you run everything inside containers: all onboot and system services, all additional application services are packaged individually as Docker Images and will be run in an isolated environment. This gives you the full control over all the ingredients and makes sure that all components are isolated against each other as well.
Right now the LinuxKit development team is working on the integration to support building and running LinuxKit images on AWS EC2. The first steps are already done, so I was eager to take my hands on and was trying to build a first example application and run it directly on AWS as an EC2 instance.
Today, this requires some manual steps and that’s my I’ve documented all the steps as a technical proof-of-concept so you can see what going on behind the scenes…
Process
- Install LinuxKit on macOS
- Create a RAW image with LinuxKit
- Upload the LinuxKit image to a S3 bucket
- Import the LinuxKit image as an EC2 snapshot
- Convert the EC2 snapshot to a new AMI
- Run an EC2 instance from the LinuxKit AMI
- Testing the instance

Step 1: Install LinuxKit on macOS
In order to create a RAW image with the help of LinuxKit, first we have to install LinuxKit. Here I’m covering the install/build process on macOS.
As a prerequisite we need some tools installed on macOS, like git, make and Docker for Mac .
Let’s clone the latest LinuxKit repo, so we can start using it. We’re going to checkout the exact same version which we’re used for this blog post, so you can replay all the steps by yourself.
$ mkdir -p ~/code/
$ cd ~/code/
$ git clone https://github.com/linuxkit/linuxkit
$ cd ~/code/linuxkit
$ git checkout 11b1eb75ad7cf64b6a58d5513431a4b941ff0ba8 # use same version!
Build and install LinuxKit with make.
$ make clean
$ make
$ make install
With the make command you build the latest CLI tools linuxkit and moby in the local ./bin/ folder.
$ ls -al ./bin/
-rwxr-xr-x   1 dieter  staff  39684928 Jun  3 13:57 linuxkit
-rwxr-xr-x   1 dieter  staff  12881312 Jun  3 13:56 moby
And finally with make install we’re just copying them over to /usr/local/bin, so that they’re installed on our system and we can use them easily. So let’s check the versions of the tools we’re going to use now.
$ linuxkit version
linuxkit version 0.0
commit: 11b1eb75ad7cf64b6a58d5513431a4b941ff0ba8

$ moby version
moby version 0.0
commit: 11b1eb75ad7cf64b6a58d5513431a4b941ff0ba8
Step 2: Create a RAW image with LinuxKit
With the current version of LinuxKit we’re not able to create a correct RAW image directly (but this feature will be added soon), so we’re creating a qcow2 image first and then convert this to a RAW image with the help of the tool qemu-img.
$ moby build -output qcow2 examples/aws.yml

Pull kernel image: linuxkit/kernel:4.9.x
Extract kernel image: linuxkit/kernel:4.9.x
Pull image: linuxkit/kernel:4.9.x
Add init containers:
Process init image: linuxkit/init:1b8a7e394d2ec2f1fdb4d67645829d1b5bdca037
Pull image: linuxkit/init:1b8a7e394d2ec2f1fdb4d67645829d1b5bdca037
Process init image: linuxkit/runc:3a4e6cbf15470f62501b019b55e1caac5ee7689f
Pull image: linuxkit/runc:3a4e6cbf15470f62501b019b55e1caac5ee7689f
Process init image: linuxkit/containerd:deaf5bf838bf7f131c2287ecff3ed9835b0497e2
Pull image: linuxkit/containerd:deaf5bf838bf7f131c2287ecff3ed9835b0497e2
Process init image: linuxkit/ca-certificates:75cf419fb58770884c3464eb687ec8dfc704169d
Pull image: linuxkit/ca-certificates:75cf419fb58770884c3464eb687ec8dfc704169d
Add onboot containers:
  Create OCI config for linuxkit/sysctl:3aa6bc663c2849ef239be7d941d3eaf3e6fcc018
Pull image: linuxkit/sysctl:3aa6bc663c2849ef239be7d941d3eaf3e6fcc018
  Create OCI config for linuxkit/dhcpcd:7d2b8aaaf20c24ad7d11a5ea2ea5b4a80dc966f1
Pull image: linuxkit/dhcpcd:7d2b8aaaf20c24ad7d11a5ea2ea5b4a80dc966f1
  Create OCI config for linuxkit/metadata:31a0b0f5557c6123beaa9c33e3400ae3c03447e0
Pull image: linuxkit/metadata:31a0b0f5557c6123beaa9c33e3400ae3c03447e0
Add service containers:
  Create OCI config for linuxkit/rngd:1fa4de44c961bb5075647181891a3e7e7ba51c31
Pull image: linuxkit/rngd:1fa4de44c961bb5075647181891a3e7e7ba51c31
  Create OCI config for linuxkit/sshd:abc1f5e096982ebc3fb61c506aed3ac9c2ae4d55
Pull image: linuxkit/sshd:abc1f5e096982ebc3fb61c506aed3ac9c2ae4d55
  Create OCI config for nginx:alpine
Pull image: nginx:alpine
Create outputs:
  aws.qcow2
Now we’ve got a VM image build with LinuxKit in .qcow2 format.
$ ls -al aws.*
-rw-r--r--  1 dieter  staff  51445760 Jun  3 14:15 aws.qcow2
The next step is to convert the .qcow2 image into a .raw image with the tool qemu-img from the QEMU project.
As we don’t have the tool qemu-img installed natively on macOS, and we’d like to use Docker for this purpose, we’re creating a small Docker Image with just this tool installed. So we don’t have to install it on macOS.
$ mkdir -p ~/code/qemu-img
$ cd ~/code/qemu-img
$ cat > Dockerfile <<FILE
FROM alpine:3.6
RUN apk add --no-cache qemu-img
ENTRYPOINT ["/usr/bin/qemu-img"]
FILE
$ docker build -t qemu-img .
$ alias qemu-img='docker run --rm -ti -v $(pwd):$(pwd) -w $(pwd) qemu-img'
Now we do have defined an alias qemu-img and can analyse our RAW image with. In the background there will just be a Docker container started for every invoke of this command.
$ cd ~/code/linuxkit
$ qemu-img info aws.qcow2
image: aws.qcow2
file format: qcow2
virtual size: 1.0G (1073741824 bytes)
disk size: 49M
cluster_size: 65536
Format specific information:
    compat: 1.1
    lazy refcounts: false
    refcount bits: 16
    corrupt: false
We can easily convert the .qcow2 image now to our required RAW image.
$ qemu-img convert aws.qcow2 aws.raw
The RAW image is quite large is size, because it’s unencrypted.
$ ls -al aws.*
-rw-r--r--  1 dieter  staff    51445760 Jun  3 14:15 aws.qcow2
-rw-r--r--  1 dieter  staff  1073741824 Jun  3 14:36 aws.raw
But before we upload this RAW image to S3 we should check the file type again.
$ qemu-img info aws.raw
image: aws.raw
file format: raw
virtual size: 1.0G (1073741824 bytes)
disk size: 1.0G
As you can see, we just used a few simple tools and commands to create a first LinuxKit image locally on macOS, converted the image into RAW image format which will we accepted by AWS. And with the help of the Docker Engine we were able to do this without installing any additional tools and software on our Mac!
Step 3: Upload the LinuxKit image to a S3 bucket
In order to use S3 and the AWS cli you should have the AWS tools installed and logged into your AWS account.
For Installing the AWS tools you can use Homebrew.
$ brew install awscli
After the installation you can configure your aws cli with aws configure. I recommend to make a separate user in the IAM.
Here I’m using a S3 bucket with the name dr-raw-images. Uploading the RAW image will take some time, as it’s about 1 GByte in size and the file transfer depends highly on your internet connection.
$ aws s3 cp aws.raw s3://dr-raw-images
Check, if the LinuxKit image is available on our S3 bucket.
$ aws s3 ls s3://dr-raw-images/aws.raw
2017-06-03 13:09:49 1073741824 aws.raw
Now we do have our LinuxKit image successfully uploaded into a S3 bucket where we can pick it up by the next step and import this image as an EC2 snapshot.
Step 4: Import the LinuxKit image as an EC2 snapshot
Creating an EC2 snapshot from a RAW image stored in a S3 bucket is quite easy, and we can follow the first two steps of the documented way from Importing a Disk as a Snapshot Using VM Import/Export.
We have to define a disk container, so we can import the RAW image. Here we use our S3 bucket name and the file name of the RAW image, that’s all.
$ mkdir -p ~/code/linuxkit-aws
$ cd ~/code/linuxkit-aws
$ cat  > container.json <<FILE
{
    "Description": "LinuxKit AWS",
    "Format": "raw",
    "UserBucket": {
        "S3Bucket": "dr-raw-images",
        "S3Key": "aws.raw"
    }
}
FILE
Now we can start the import process, which will take a few seconds or maybe minutes to complete.
$ aws ec2 import-snapshot --description "LinuxKit AWS" \
    --disk-container file://container.json
If you get the following error:
An error occurred (InvalidParameter) when calling the ImportSnapshot operation:
The sevice role <vmimport> does not exist or does not have sufficient permissions for the service to continue
The next Steps are explained as well from the Amazon Docs for Import IAM permissions.
Or the next steps below will do the same for you.
cat > trust-policy.json <<FILE
{
   "Version": "2012-10-17",
   "Statement": [
      {
         "Effect": "Allow",
         "Principal": { "Service": "vmie.amazonaws.com" },
         "Action": "sts:AssumeRole",
         "Condition": {
            "StringEquals":{
               "sts:Externalid": "vmimport"
            }
         }
      }
   ]
}
FILE
After the policy is created you can run the import command.
aws iam create-role --role-name vmimport --assume-role-policy-document file://trust-policy.json
Now we need to define the role policy for our bucket. Replace dr-raw-images with your bucket name.
cat > role-policy.json <<FILE
{
   "Version": "2012-10-17",
   "Statement": [
      {
         "Effect": "Allow",
         "Action": [
            "s3:ListBucket",
            "s3:GetBucketLocation"
         ],
         "Resource": [
            "arn:aws:s3:::dr-raw-images"
         ]
      },
      {
         "Effect": "Allow",
         "Action": [
            "s3:GetObject"
         ],
         "Resource": [
            "arn:aws:s3:::dr-raw-images/*"
         ]
      },
      {
         "Effect": "Allow",
         "Action":[
            "ec2:ModifySnapshotAttribute",
            "ec2:CopySnapshot",
            "ec2:RegisterImage",
            "ec2:Describe*"
         ],
         "Resource": "*"
      }
   ]
}
FILE
Again we need to apply the role.
aws iam put-role-policy --role-name vmimport --policy-name vmimport --policy-document file://role-policy.json
Now you can edit the command from above again and we’ll get an instant API feedback.
$ aws ec2 import-snapshot --description "LinuxKit AWS" \
    --disk-container file://container.json
With the instant API feedback in form of a JSON message where we get some important details we need for the following step.
{
    "SnapshotTaskDetail": {
        "Status": "active",
        "Description": "LinuxKit AWS",
        "Format": "RAW",
        "DiskImageSize": 0.0,
        "Progress": "3",
        "UserBucket": {
            "S3Bucket": "dr-raw-images",
            "S3Key": "aws.raw"
        },
        "StatusMessage": "pending"
    },
    "Description": "LinuxKit AWS",
    "ImportTaskId": "import-snap-fgg27tzh"
}
We just pick up the ImportTaskId and can check the progress of the import snapshot task.
$ aws ec2 describe-import-snapshot-tasks \
    --import-task-ids import-snap-fgg27tzh
{
    "ImportSnapshotTasks": [
        {
            "SnapshotTaskDetail": {
                "Status": "active",
                "Description": "LinuxKit AWS",
                "Format": "RAW",
                "DiskImageSize": 1073741824.0,
                "Progress": "35",
                "UserBucket": {
                    "S3Bucket": "dr-raw-images",
                    "S3Key": "aws.raw"
                },
                "StatusMessage": "downloading/converting"
            },
            "Description": "LinuxKit AWS",
            "ImportTaskId": "import-snap-fgg27tzh"
        }
    ]
}
Here we see the import is still in progress "Progress": "35" and we have to wait for completion. Once the import is complete we’ll see the following API result.
$ aws ec2 describe-import-snapshot-tasks \
    --import-task-ids import-snap-fgg27tzh
{
    "ImportSnapshotTasks": [
        {
            "SnapshotTaskDetail": {
                "Status": "completed",
                "Description": "LinuxKit AWS",
                "Format": "RAW",
                "DiskImageSize": 1073741824.0,
                "SnapshotId": "snap-05b3f4866ae7de3e3",
                "UserBucket": {
                    "S3Bucket": "dr-raw-images",
                    "S3Key": "aws.raw"
                }
            },
            "Description": "LinuxKit AWS",
            "ImportTaskId": "import-snap-fgg27tzh"
        }
    ]
}
Please pick up the SnapshotId which will be needed for our next step.
Step 5: Convert the EC2 snapshot to a new AMI
Here is our most interesting step. We’re creating the final LinuxKit AMI directly from the EC2 snapshot. If you want to learn more about this step, you can read the section “Creating a Linux AMI from a Snapshot” from the docs at Creating an Amazon EBS-Backed Linux AMI.
$ aws ec2 register-image \
    --name 'LinuxKit AWS AMI-1' \
    --architecture x86_64 \
    --virtualization-type hvm \
    --root-device-name /dev/sda1 \
    --block-device-mappings \
    '[{"DeviceName": "/dev/sda1", "Ebs": {"SnapshotId": "snap-05b3f4866ae7de3e3", "VolumeType": "gp2"}}]'
{
    "ImageId": "ami-5f25ff30"
}
At the end we did create a new AMI from our LinuxKit image and get back the AMI ImageId “ami-5f25ff30”.
Step 6: Run an EC2 instance from the LinuxKit AMI
By default no network access is granted to a new EC2 instance, so we have to create a new security group first and open some TCP network ports we’d like to access from the outside.
$ aws ec2 create-security-group \
    --group-name linuxkit-sg \
    --description "Security group for LinuxKit in EC2"
{
    "GroupId": "sg-f8dcbf93"
}
Take the security group GroupId from the API answer as we’ll need it later when we start the EC2 instance.
As our LinuxKit VM has a built-in SSHD and a Nginx webserver we’re going to open the network ports 22/tcp and 80/tcp.
$ aws ec2 authorize-security-group-ingress \
    --group-name linuxkit-sg \
    --protocol tcp --port 22 --cidr 0.0.0.0/0

$ aws ec2 authorize-security-group-ingress \
    --group-name linuxkit-sg \
    --protocol tcp --port 80 --cidr 0.0.0.0/0
To access the EC2 instance you have to create a personal SSH key/value pair (see AWS docs Creating a Key Pair Using Amazon EC2) and save this locally, I’m using the name amazon-dr and the file name amazon-dr.pem for mine. (ssh-keygen -t rsa -b 8192 -f $HOME/.ssh/amazon-dr && cat $HOME/.ssh/amazon-dr.pub | pbcopy)
Now we did setup all the basic things and we can start a new EC2 instance using the required parameters for AMI, security group and SSH key pair name.
$ aws ec2 run-instances \
    --image-id ami-5f25ff30 \
    --count 1 \
    --instance-type t2.micro \
    --security-group-ids sg-f8dcbf93 \
    --key-name amazon-dr
{
    "OwnerId": "164570622824",
    "ReservationId": "r-03118588ae60d8ba0",
    "Groups": [],
    "Instances": [
        {
            "Monitoring": {
                "State": "disabled"
            },
            "PublicDnsName": "",
            "RootDeviceType": "ebs",
            "State": {
                "Code": 0,
                "Name": "pending"
            },
            "EbsOptimized": false,
            "LaunchTime": "2017-06-03T13:38:49.000Z",
            "PrivateIpAddress": "172.31.20.215",
            "ProductCodes": [],
            "VpcId": "vpc-6c482b04",
            "StateTransitionReason": "",
            "InstanceId": "i-0aca40cd80557de1a",
            "ImageId": "ami-5f25ff30",
            "PrivateDnsName": "ip-172-31-20-215.eu-central-1.compute.internal",
            "KeyName": "amazon-dr",
            "SecurityGroups": [
                {
                    "GroupName": "linuxkit-sg",
                    "GroupId": "sg-f8dcbf93"
                }
            ],
            "ClientToken": "",
            "SubnetId": "subnet-608be11a",
            "InstanceType": "t2.micro",
            "NetworkInterfaces": [
                {
                    "Status": "in-use",
                    "MacAddress": "06:39:b9:fe:11:31",
                    "SourceDestCheck": true,
                    "VpcId": "vpc-6c482b04",
                    "Description": "",
                    "NetworkInterfaceId": "eni-ce32e2bf",
                    "PrivateIpAddresses": [
                        {
                            "PrivateDnsName": "ip-172-31-20-215.eu-central-1.compute.internal",
                            "Primary": true,
                            "PrivateIpAddress": "172.31.20.215"
                        }
                    ],
                    "PrivateDnsName": "ip-172-31-20-215.eu-central-1.compute.internal",
                    "Attachment": {
                        "Status": "attaching",
                        "DeviceIndex": 0,
                        "DeleteOnTermination": true,
                        "AttachmentId": "eni-attach-03765a63",
                        "AttachTime": "2017-06-03T13:38:49.000Z"
                    },
                    "Groups": [
                        {
                            "GroupName": "linuxkit-sg",
                            "GroupId": "sg-f8dcbf93"
                        }
                    ],
                    "SubnetId": "subnet-608be11a",
                    "OwnerId": "164570622824",
                    "PrivateIpAddress": "172.31.20.215"
                }
            ],
            "SourceDestCheck": true,
            "Placement": {
                "Tenancy": "default",
                "GroupName": "",
                "AvailabilityZone": "eu-central-1b"
            },
            "Hypervisor": "xen",
            "BlockDeviceMappings": [],
            "Architecture": "x86_64",
            "StateReason": {
                "Message": "pending",
                "Code": "pending"
            },
            "RootDeviceName": "/dev/sda1",
            "VirtualizationType": "hvm",
            "AmiLaunchIndex": 0
        }
    ]
}
Step 7: Testing the instance
After a few seconds or maybe a minute the EC2 instance should be up and running and we can get their public IP address from the EC2 web console.

If you need help to connect to your instance via SSH, just hit the Connect button and you’ll get the instructions.
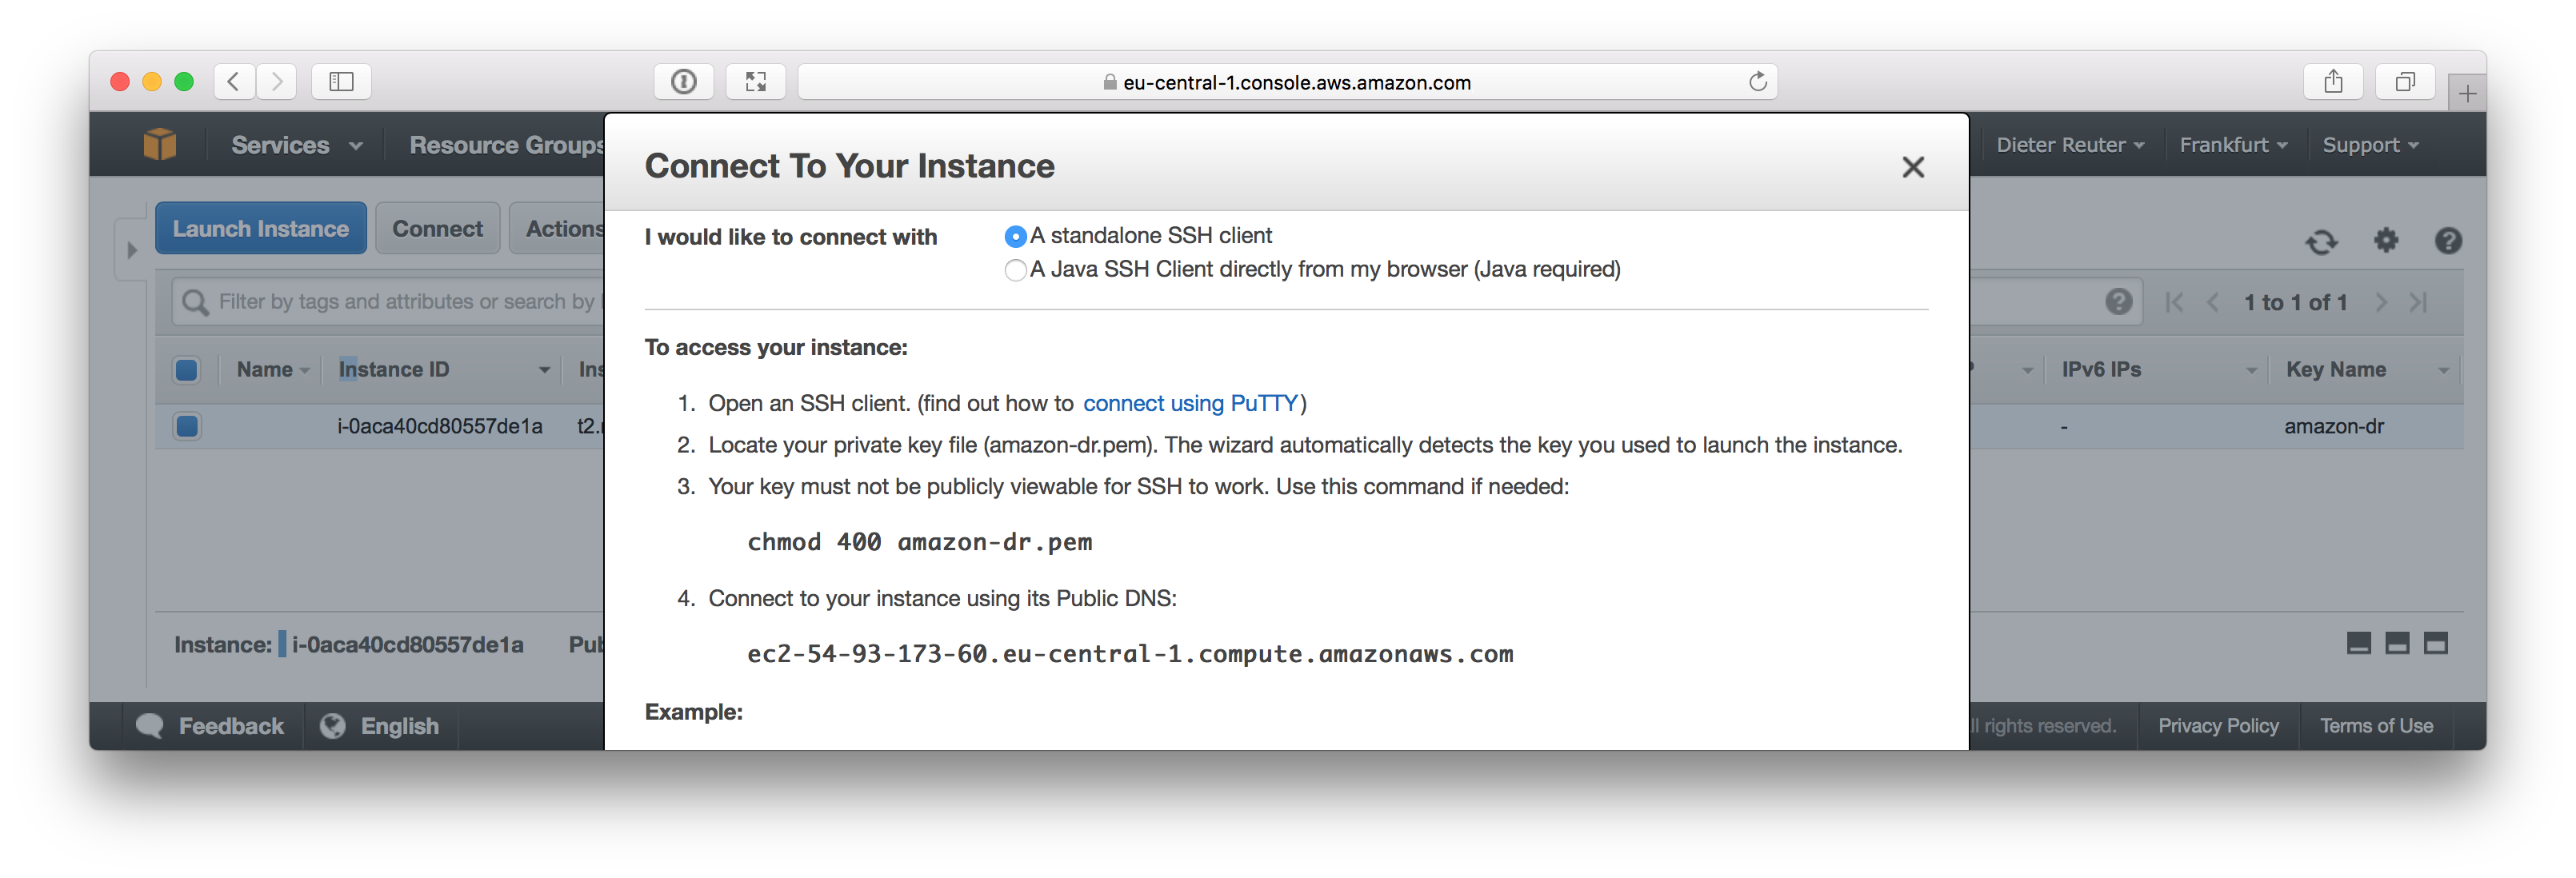
To prove that everything went well, we try to login via SSH.
🐳 ssh -i ~/.ssh/amazon-dr.pem root@54.93.173.60

The authenticity of host '54.93.173.60 (54.93.173.60)' can't be established.
ECDSA key fingerprint is SHA256:7KIfPSuli4OrmIsQhwoq/pfTs5M2ACJevOzlQ0waVxE.
Are you sure you want to continue connecting (yes/no)? yes
Warning: Permanently added '54.93.173.60' (ECDSA) to the list of known hosts.
Welcome to LinuxKit

ip-172-31-20-215:~# hostname
ip-172-31-20-215.eu-central-1.compute.internal

ip-172-31-20-215:~# uname -a
Linux ip-172-31-20-215.eu-central-1.compute.internal 4.9.30-linuxkit #1 SMP Tue May 30 11:40:28 UTC 2017 x86_64 Linux

ip-172-31-20-215:~# nsenter -t 1 -m -u -n -i ash
ip-172-31-20-215:/# runc list
ID          PID         STATUS      BUNDLE                        CREATED                          OWNER
nginx       527         running     /run/containerd/linux/nginx   2017-06-03T13:39:12.598784632Z   root
rngd        575         running     /run/containerd/linux/rngd    2017-06-03T13:39:12.645540905Z   root
sshd        606         running     /run/containerd/linux/sshd    2017-06-03T13:39:12.681635105Z   root

ip-172-31-20-215:/# exit
ip-172-31-20-215:~# exit
Connection to 54.93.173.60 closed.
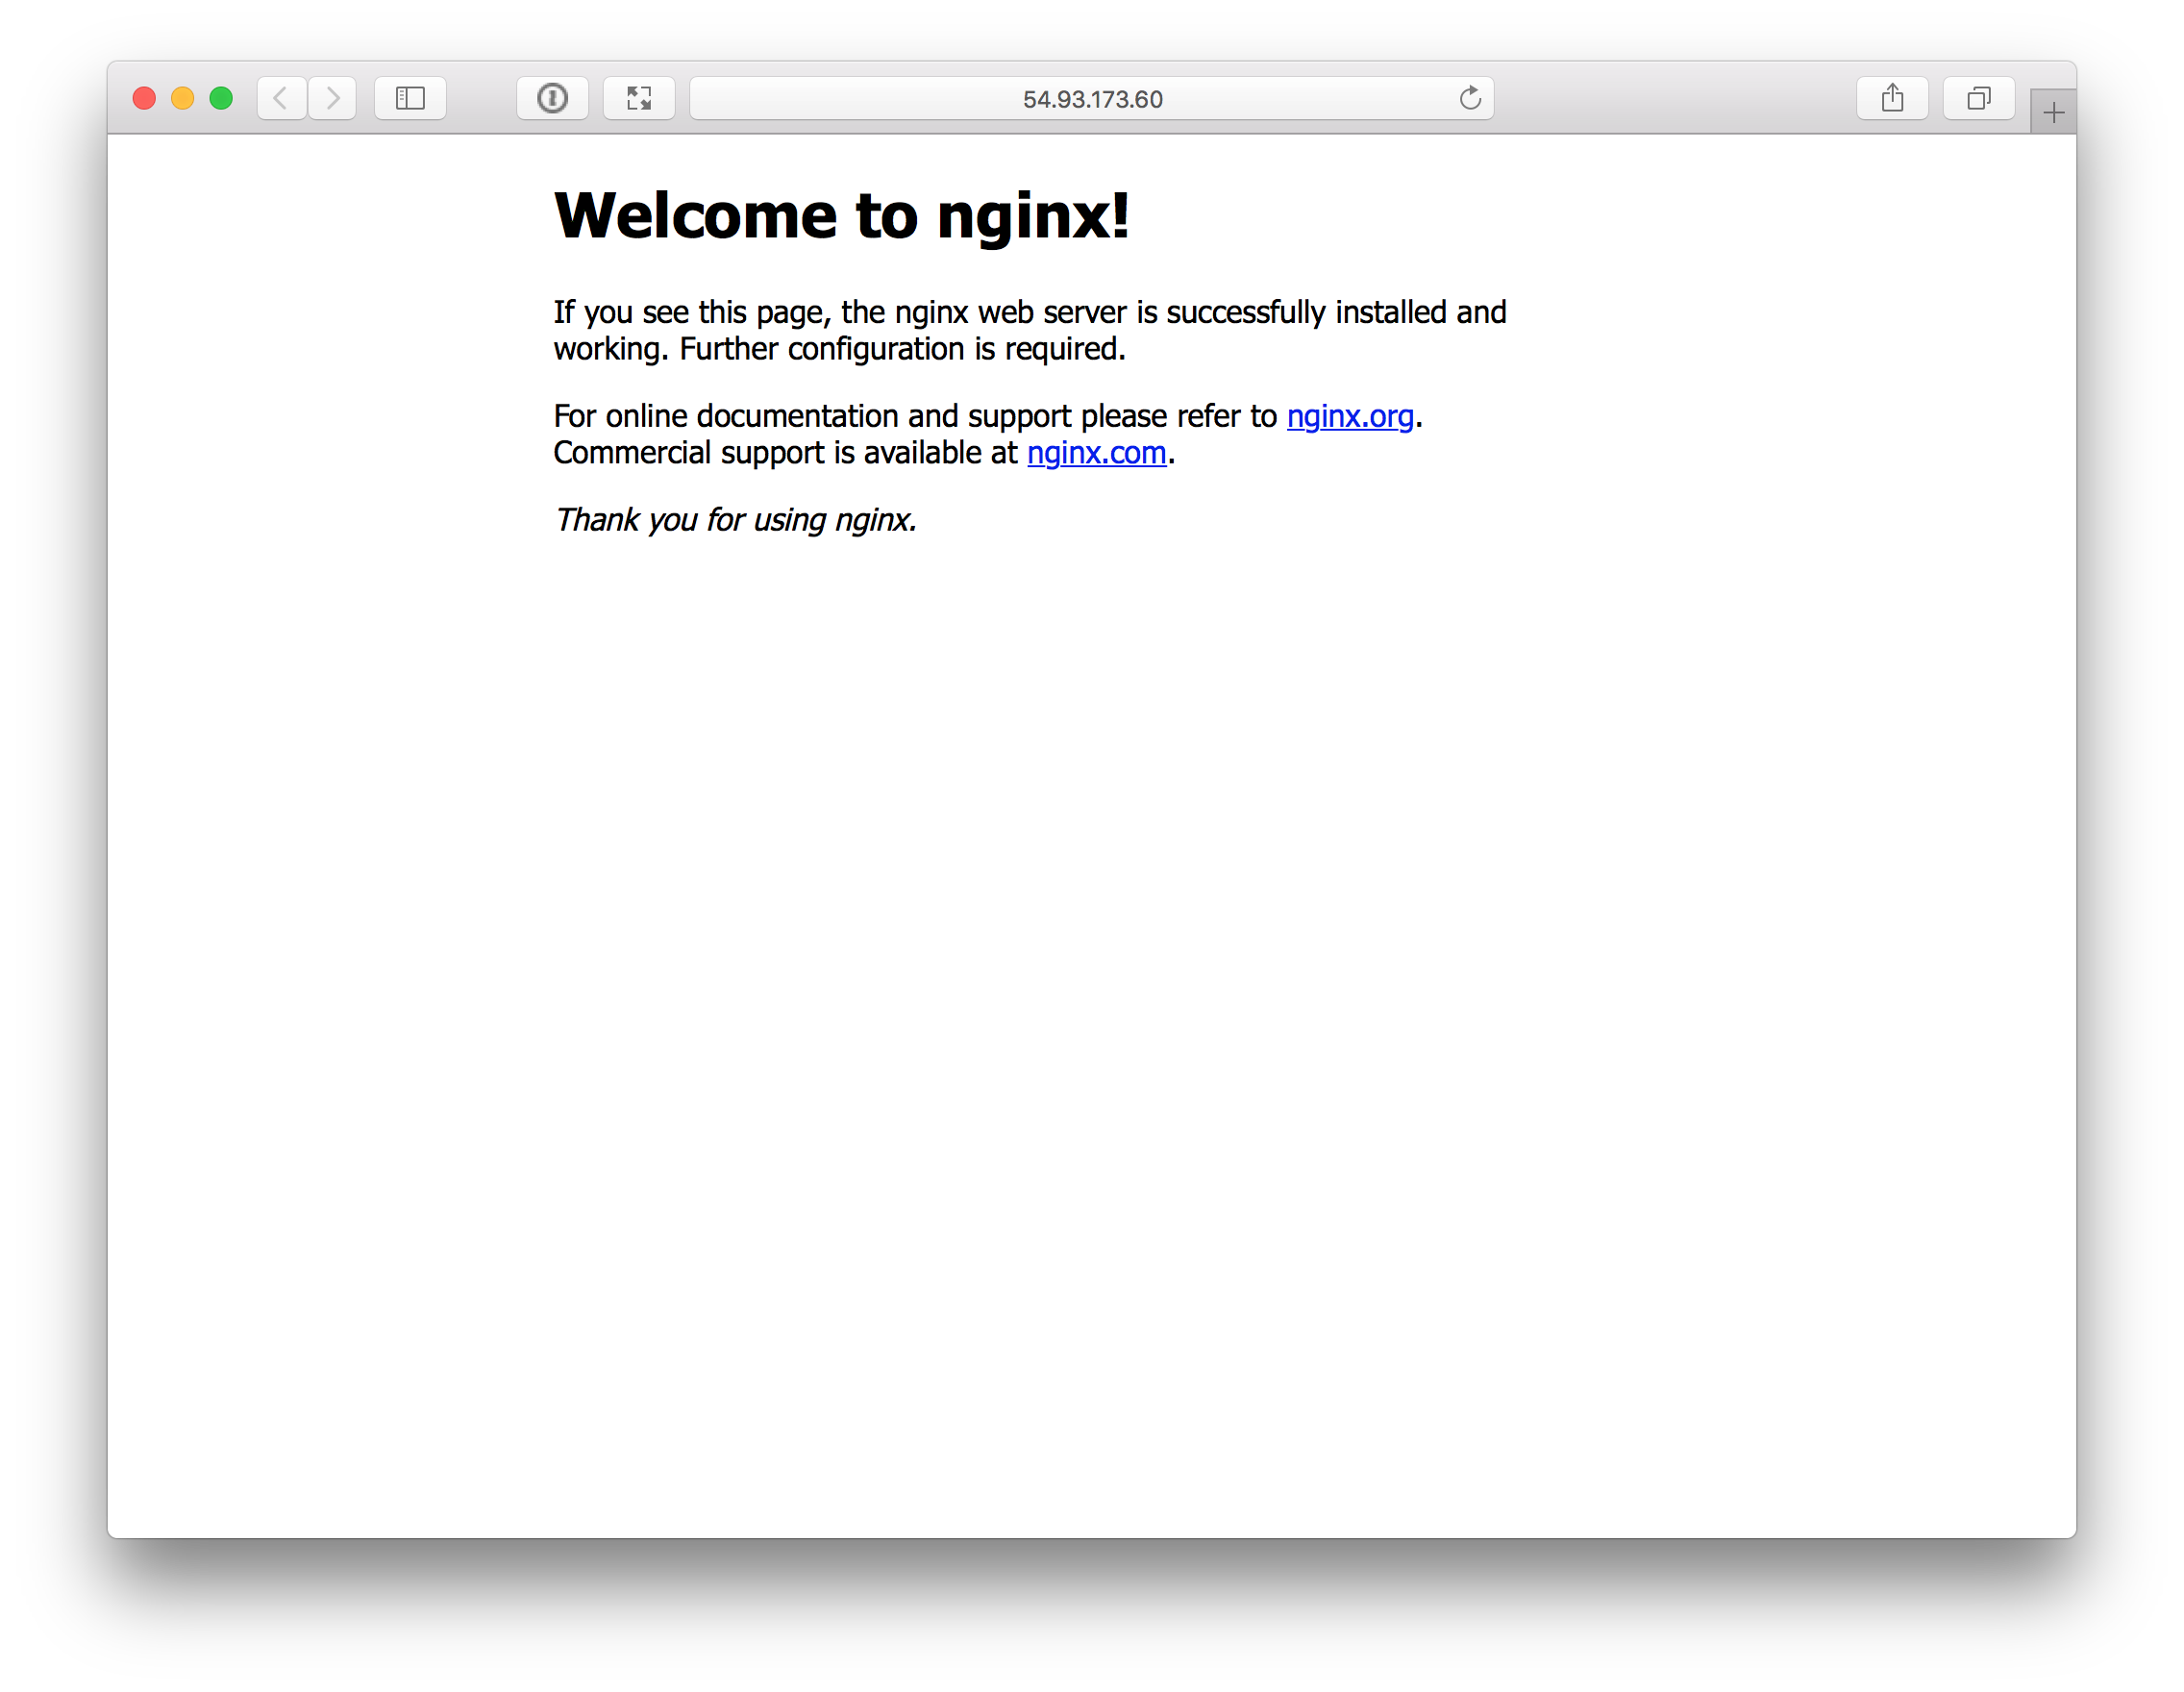
Additionally we can access the built-in NGINX webserver via curl…
🐳 curl http://54.93.173.60
<!DOCTYPE html>
<html>
<head>
<title>Welcome to nginx!</title>
<style>
    body {
        width: 35em;
        margin: 0 auto;
        font-family: Tahoma, Verdana, Arial, sans-serif;
    }
</style>
</head>
<body>
<h1>Welcome to nginx!</h1>
<p>If you see this page, the nginx web server is successfully installed and
working. Further configuration is required.</p>

<p>For online documentation and support please refer to
<a href="http://nginx.org/">nginx.org</a>.<br/>
Commercial support is available at
<a href="http://nginx.com/">nginx.com</a>.</p>

<p><em>Thank you for using nginx.</em></p>
</body>
</html>
…or we just open the default web browser.
🐳 open http://54.93.173.60
Next Steps
This blog post showed the technical details about how to create a LinuxKit image and import it as a custom AMI to Amazon EC2. All these detailed manual steps can be used to understand the whole process a lot better and could be used as a basis to fully automate the creation of custom AMI’s in general.
In the meantime the LinuxKit development team is working hard to improve and automate this process and is going to implement the complete AWS support into the next version of LinuxKit. One of the next steps will be to update moby tool and qemu fixes, so it is possible to create a RAW image directly with moby build -output img -size 200M and define the resulting disk image size. Another improvement is in development now to include linuxkit push and linuxkit run commands with a direct AWS support using the AWS API internally.
Then it will get extremely easy to use LinuxKit to create custom AMI’s and run them in EC2. So it will be a trivial “build, push, run” cycle. The planned process looks like:
# create LinuxKit image (resulting file= aws.img)
moby build -output img -size 200M examples/aws.yml

# push image to AWS S3 bucket, import as snapshot, create a new AMI
linuxkit push aws -bucket <your-bucket-name> aws.img

# run LinuxKit AMI as an new EC2 instance
linuxkit run aws -ami <ami-id> ...
The development will hopefully takes only a few days more and should be available next week or so. We’re eagerly looking forward to see the complete AWS support in LinuxKit pretty soon.
Open questions
While working on getting my first LinuxKit image running as an EC2 instance I was looking for some deeper technical informations, but wasn’t able to find all answers by myself. Maybe someone out there could help and I’d like to place my open questions here.
How can I attach to the serial/UART console of the VM really early in the boot process?
Currently I know you can get the boot logs later when the VM is successfully booted, but I’m more interested in an early access from the first second on. Then it would be possible to see all problems and errors which occure even when the VM can’t boot at all. An EC instance is running in a Xen hypervisor and therefore it should be possible to attach the serial tty console with all the kernel logs from the VM, but I can’t find any API to do so.
What is the exact boot process of an AMI in EC2?
When I’m starting a new EC2 instance based on a LinuxKit AMI it will take some seconds until the instance is booted and I can already access it via SSH. But at the AWS EC2 web console it takes a few minutes until the instance will be displayed as booted and operating normal.
Are there exists any detailed informations and specs about creating and running custom AMI’s?
It seems there is something going on in the background with checks and additional attemps to provision the machine. I guess there is even more room for improvements as soon as we can understand all the details.
So, if you could answer at least one of these questions or you could share some pointers I’d really appreciate your feedback!
Feedback, please
As always we want you to give us your feedback and share it on Twitter.
So, please send us your feedback or tweet your thoughts and ideas on this project at @bee42solutions.
Dieter @Quintus23M, bee42 solutions